 WOODWORKSTEAMPUNKRAILROADSLIBRARY
(mostly HO scale)
 Model railroading for us is a series of never-ending projects. From buidling the benchwork, laying track, wiring, building models,
upgrading models, making our own models, to running the layout. What is here are some of the projects I thought to share.
These are various projects I've shared on social media, but as I like to write, I thought it would be nice to document a variety of
modeling projects. Some simple, others complex. Scratchbuilding (or as I more accurately call my efforts, scrapbuilding), refurbishing old kits,
and kitbashing are all represented. I don't do superdetailing (at least I don't believe that I do). Highly accurate and precise
models are nice, but often are fragile and require a significant investment of time and/or money. I want to operate my trains and not feel
like I might break them. There is so much to do to get things running and populated, that my goal is to get something to "good enough for me"
at a price that makes me not afraid to work with my layout.
Model railroading for us is a series of never-ending projects. From buidling the benchwork, laying track, wiring, building models,
upgrading models, making our own models, to running the layout. What is here are some of the projects I thought to share.
These are various projects I've shared on social media, but as I like to write, I thought it would be nice to document a variety of
modeling projects. Some simple, others complex. Scratchbuilding (or as I more accurately call my efforts, scrapbuilding), refurbishing old kits,
and kitbashing are all represented. I don't do superdetailing (at least I don't believe that I do). Highly accurate and precise
models are nice, but often are fragile and require a significant investment of time and/or money. I want to operate my trains and not feel
like I might break them. There is so much to do to get things running and populated, that my goal is to get something to "good enough for me"
at a price that makes me not afraid to work with my layout.
If a project is more involved, there will be a link to a separate page. Things I considered to be relatively simple to implement will be shown on this page.
| Railroads: | Central Railway (club) | Southern Railway (US) | As Seen On Screen |
| Building Projects: | Rescues | Kitbashes | Scratchbuilds |
| Scenic Details: | Coal Loads | Oil Barrels | Paper Accessories | Scraps to Accessories | Vehicles - Trucks | Wood Props |
| Adventures in 3D | In progress |
| Central Railway (club) | |||
|---|---|---|---|
|
In 1992, the Central Railway Model & Historical Association was formed in Central, SC. I was a part of the founding membership (and the youngest one who is
still around on a regular basis), and my first serious forays into model railroading and railroad history started as part of my involvement with the club.
The club's HO scale model railroad, the Central Railway, is a ficticious railroad based on the Southern Railway in the Upstate of South Carolina. We adopted
the color schemes, lettering, and locales to match. A portable layout was built and displayed at the local railroad festival and made it to an NMRA convention.
I created a few locomotives and repainted some cars to take to the club events. As a graduate student on a budget, I couldn't afford to donate anything but time.
The club's initial layout was intended to be modular so we could join another local club to create a more elaborate setup, and we built it according to the Blue Ridge club's specifications. The Blue Ridge club folded a few years later, and our needs and membership evolved, so the modular layout became a portable layout that was only compatible with itself. Aging membership created challenges with access, so it got modified again and again until it was finally abandoned as a club asset, sold off, and the club switched to building FreeMo modules--ironically moving back to our original intent of having a modular railroad to combine with other clubs' modules. For a few years, we had a N-Trak interest group, but the people involved with it either moved or passed on. I don't have much of a photographic history of my modeling efforts, but here are some of the results. |
|||
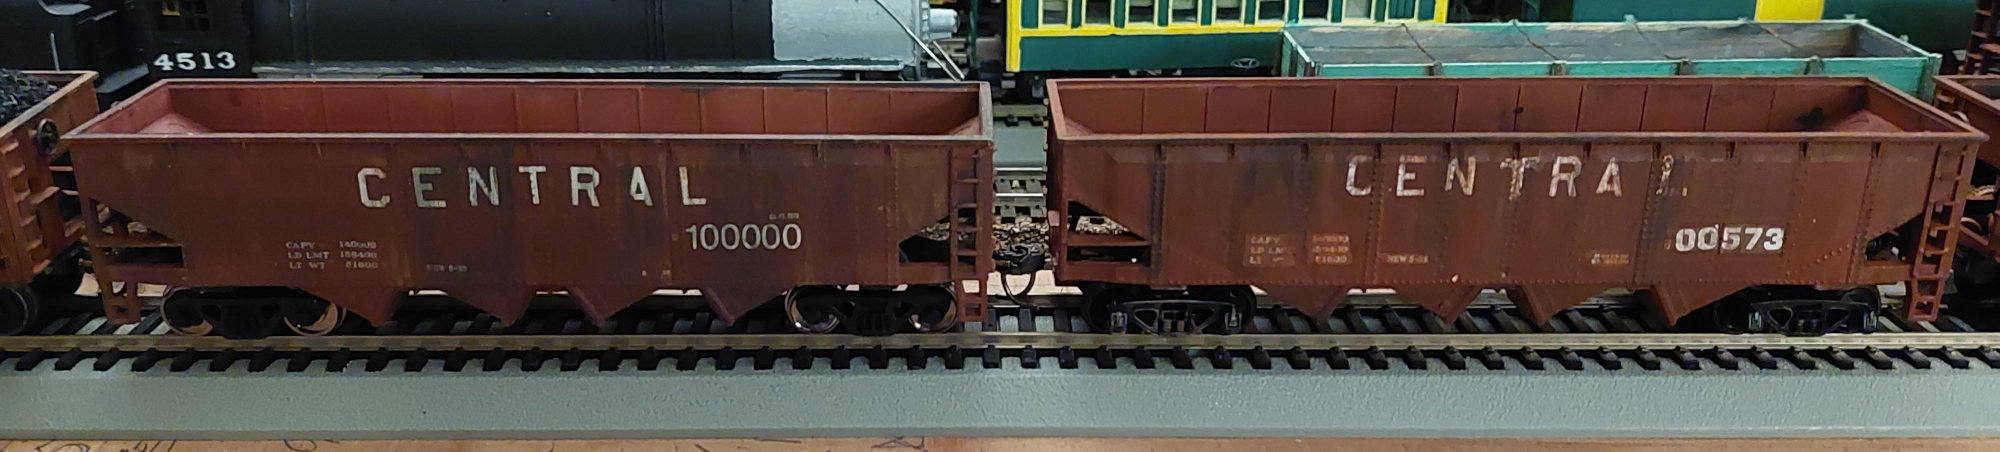 30+ years apart. These Tyco 4-bay hoppers were painted the same year, but lettering and decals were applied on one in the early 1990s and the other 30 years later. They've been upgraded with Kadees and metal wheels to improve operation and meet club rules. |
 Old Athearn kit. Simple repaint, decals, dry transfer lettering, and a paper print out of the Central Railway logo. |
 A basic Life-Like 2 bay hopper I bought in bulk for about $2 apiece. Repainted and upgraded for operations. I printed out the club logo and applied it to the car. Some index card, spliced matchsticks, and spare reefer hatches turned this into a covered hopper. It is kind of unique. |
|
| Southern Railway (US) | |
|---|---|
| I grew up with the Southern Railway, Norfolk & Western, Chesapeake & Ohio, and the Virginian in close proximity. There are some personal connections to the Southern Railway and the Cresent Limited, so it is natural that I have great affection for the company. | |
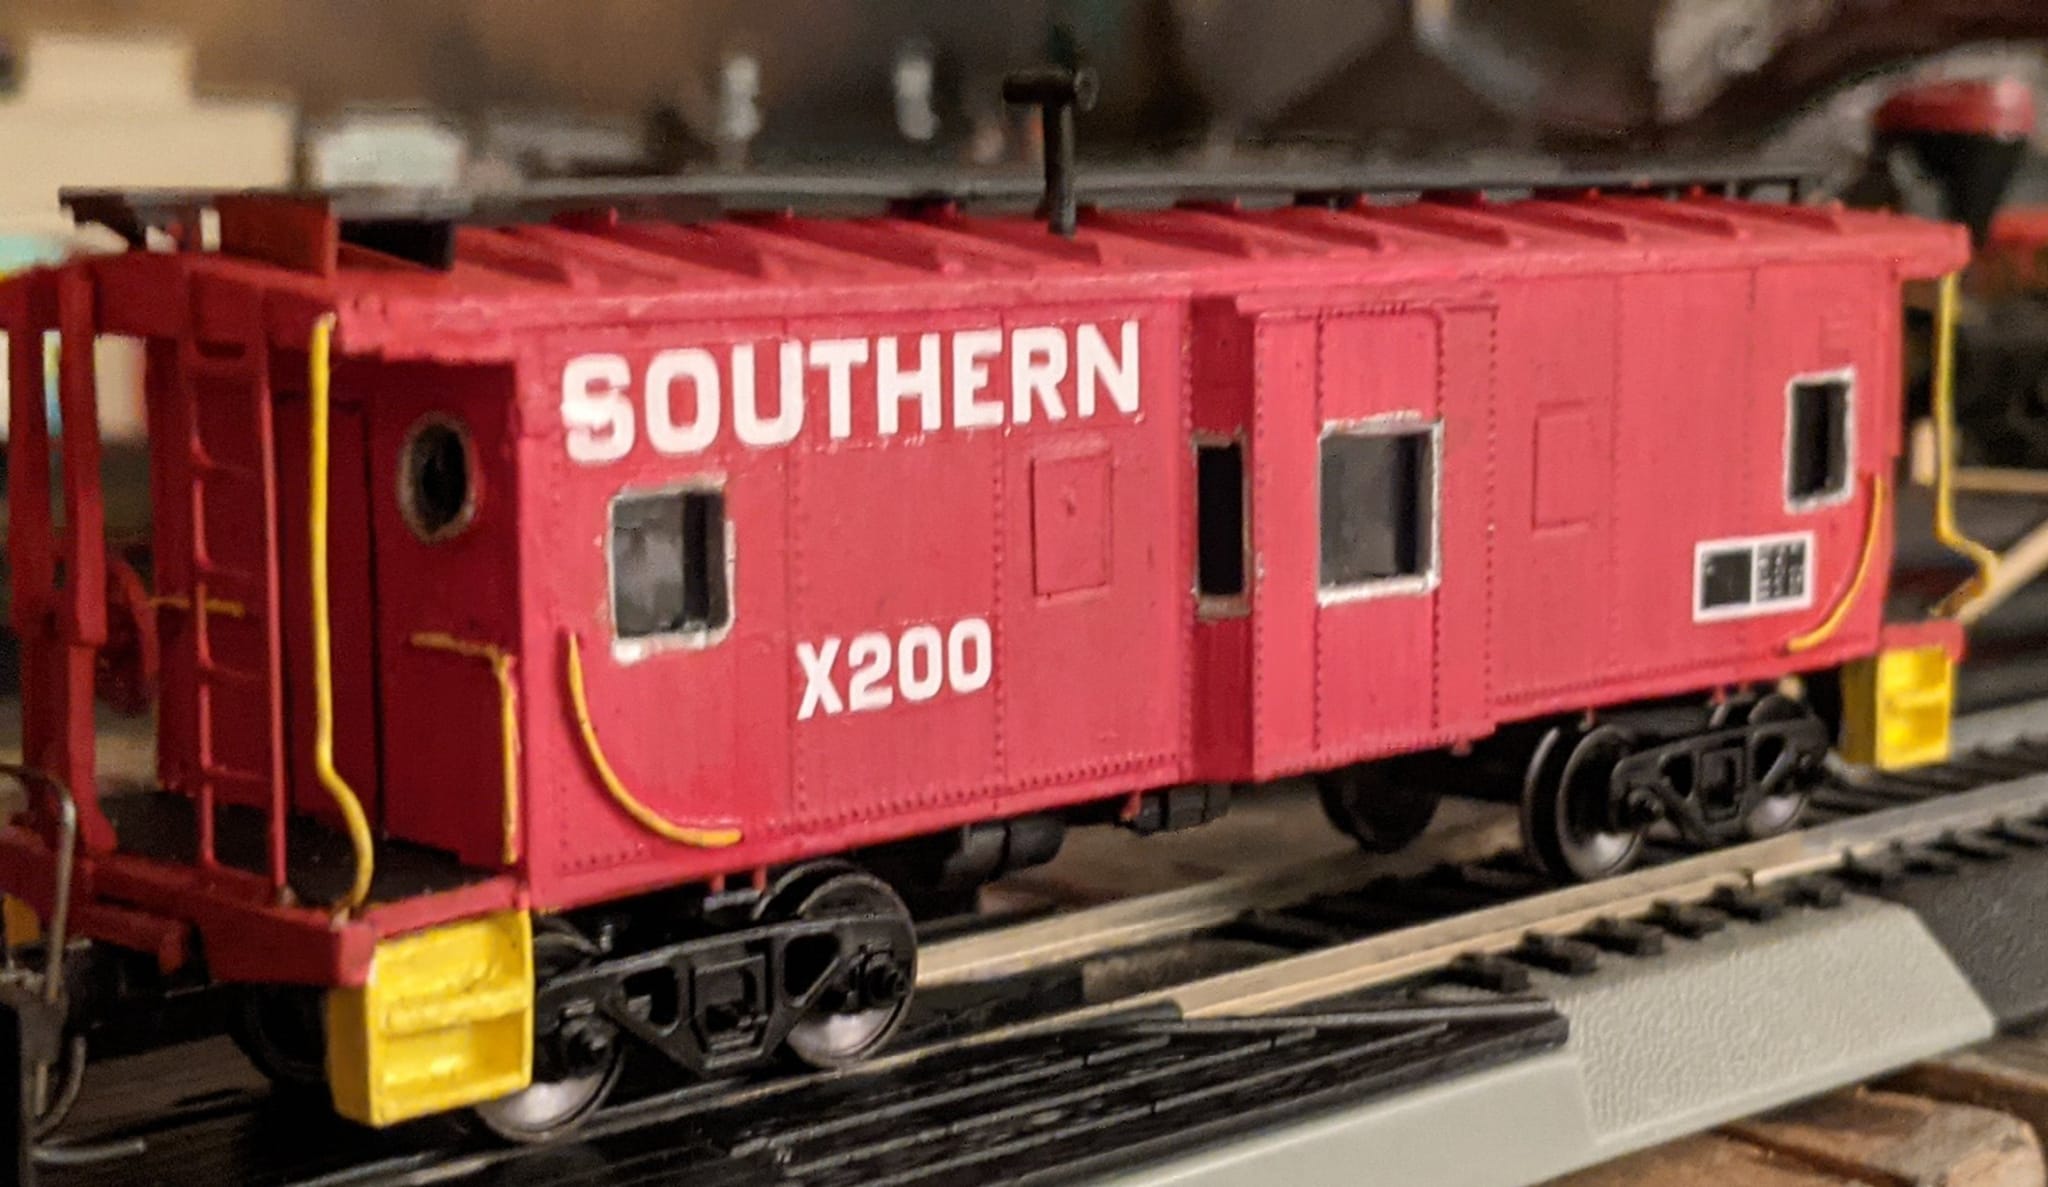 Southern Railway Caboose Project |
There are some distinctive features on Southern bay windows such as the brake wheel mounting, steps, grab irons, as well as the number and position of windows. I bought several Athearn kits a few decades ago with the intent to make a fleet of them for my then-future layout. |
| As Seen On Screen | |||
|---|---|---|---|
| I like blending my hobbies and interests. I tuck in tributes to television and movies everywhere. From Scooby Doo, Ghostbusters, Star Wars, to the Society for Creative Anachronism. The SCA references are far more subtle--as in business and place names. | |||
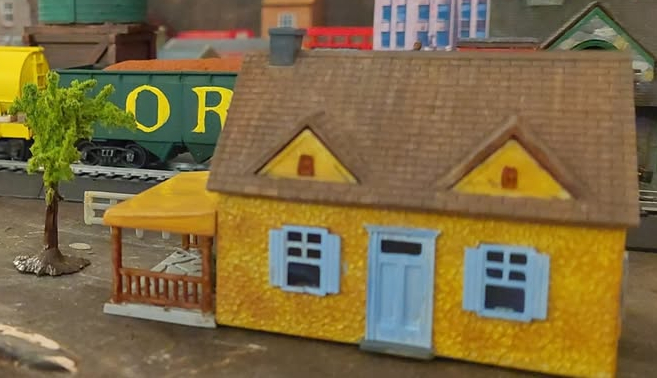 Mister Rogers' house I literally lived in his neighborhood, across the street from WQED |
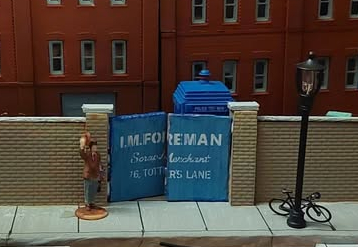 Foreman Scrap Merchant From an Unerarthly Child |
 J.Wa, Sands & Krawler Some of that junk looks awfully familiar |
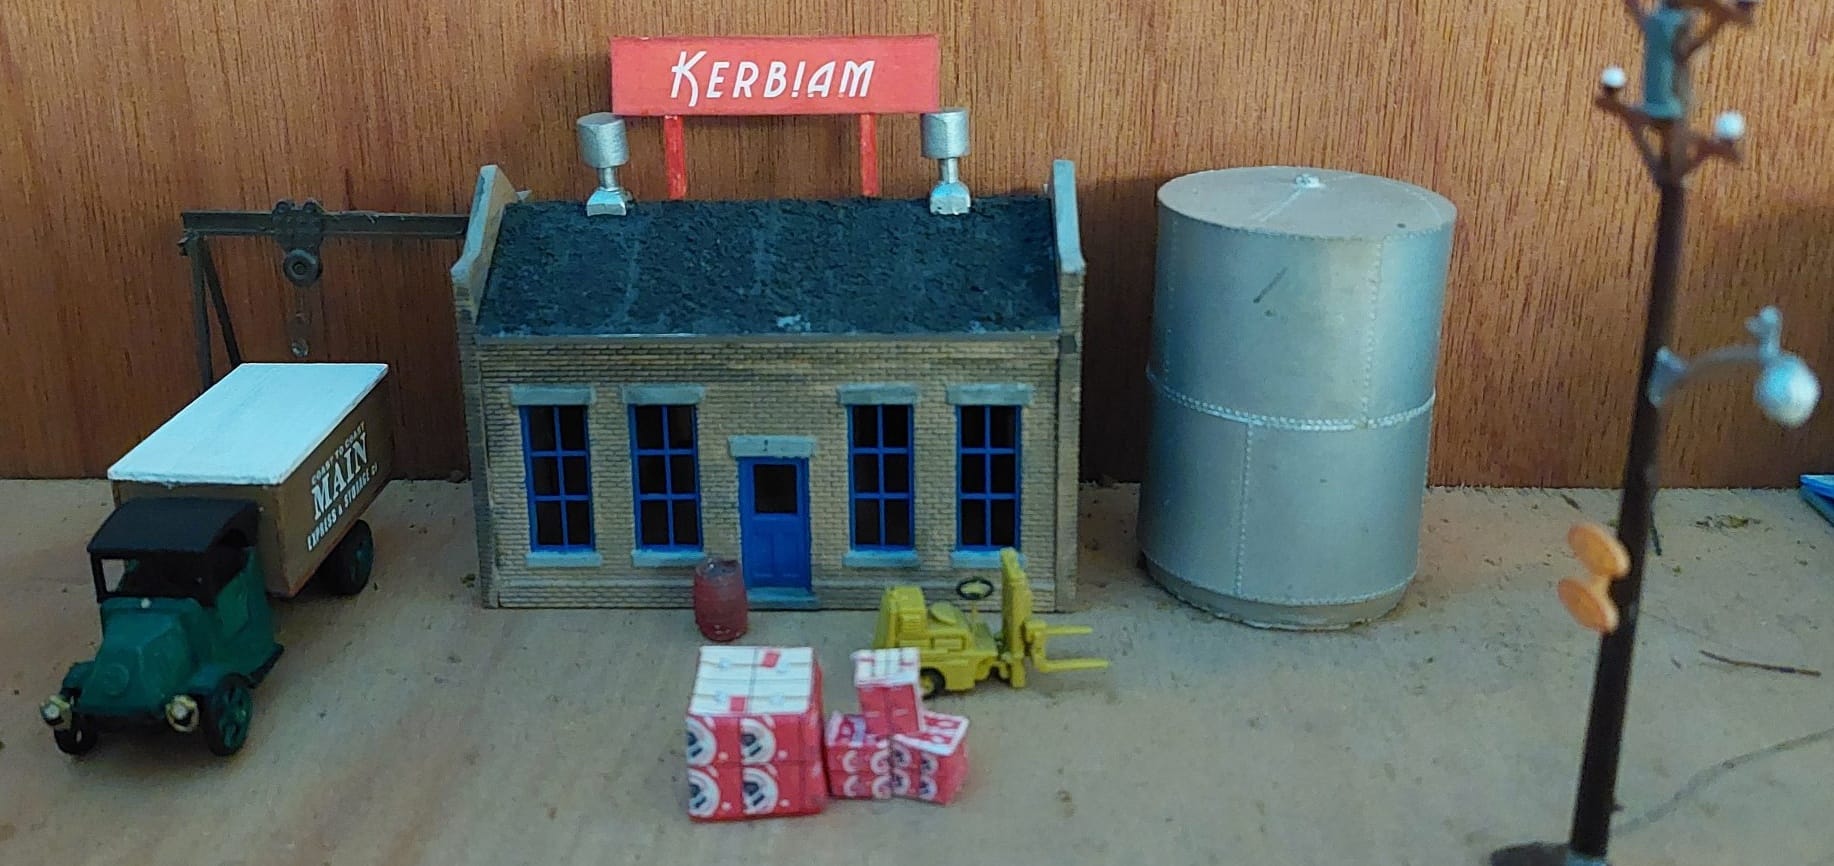 Kerb!am Careful with those packing materials |
 Kerb!am Man and Depot These guys are everywhere! |
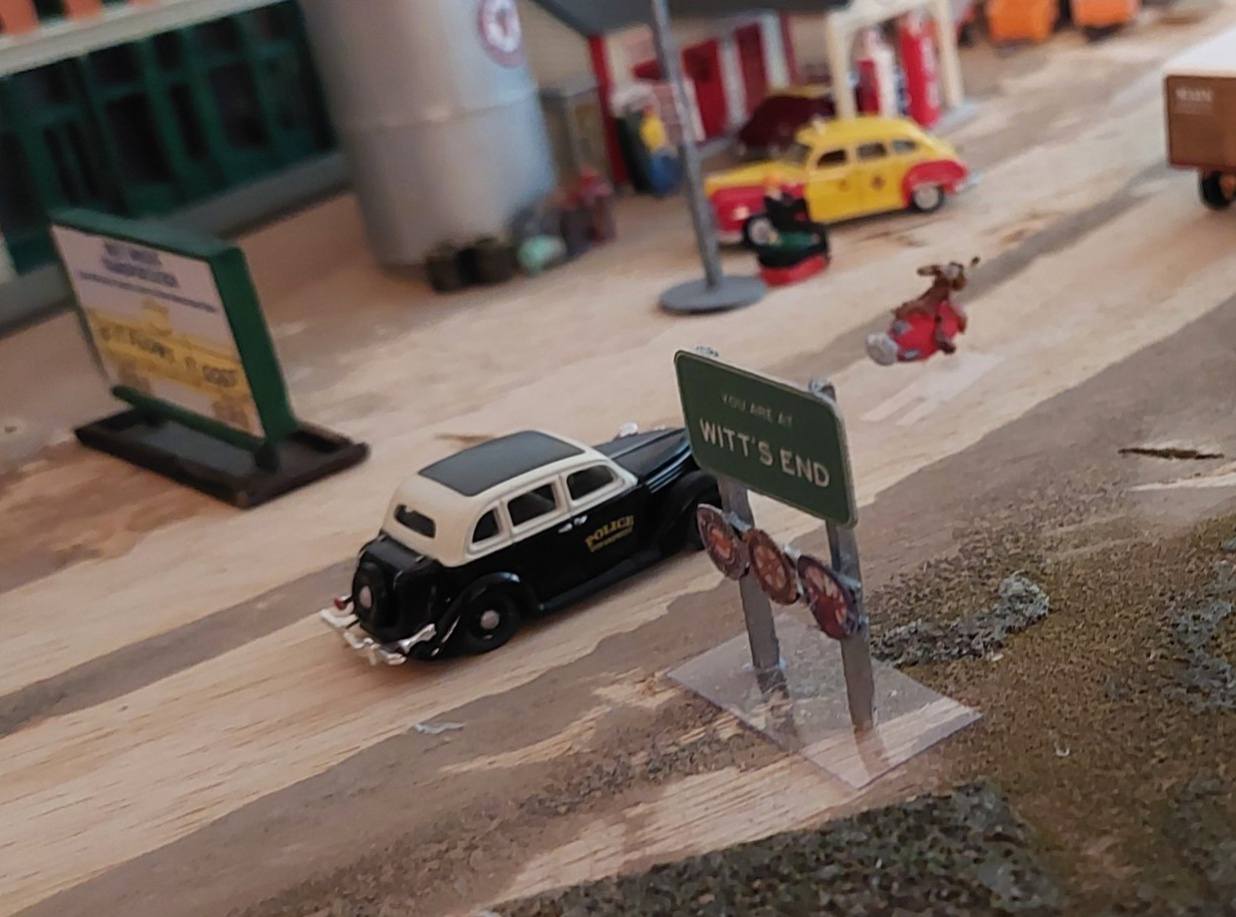 W. E. Coyote Super Genius |
 Conjunction Junction What's your function? |
|
| Rescues and Refurbishing | |
|---|---|
|
I have a number of buildings from when I was a kid that were poorly done, and I have made a habit of buying used assembled buildings and broken
buildings at train shows and flea markets (really inexpensive!). I hate to see things get tossed out when a little effort can help them out.
Sometimes it is as simple as replacing missing parts, sometimes more creativity is required. I also like reimagining common buildings
(like Plasticville) that can be made to look less toylike.
Most of my childhood models have been redone already. A $10 investment in a large box of "junk" buildings and parts from a train show has provided me with over a dozen new buildings and scenes for my layout. |
|
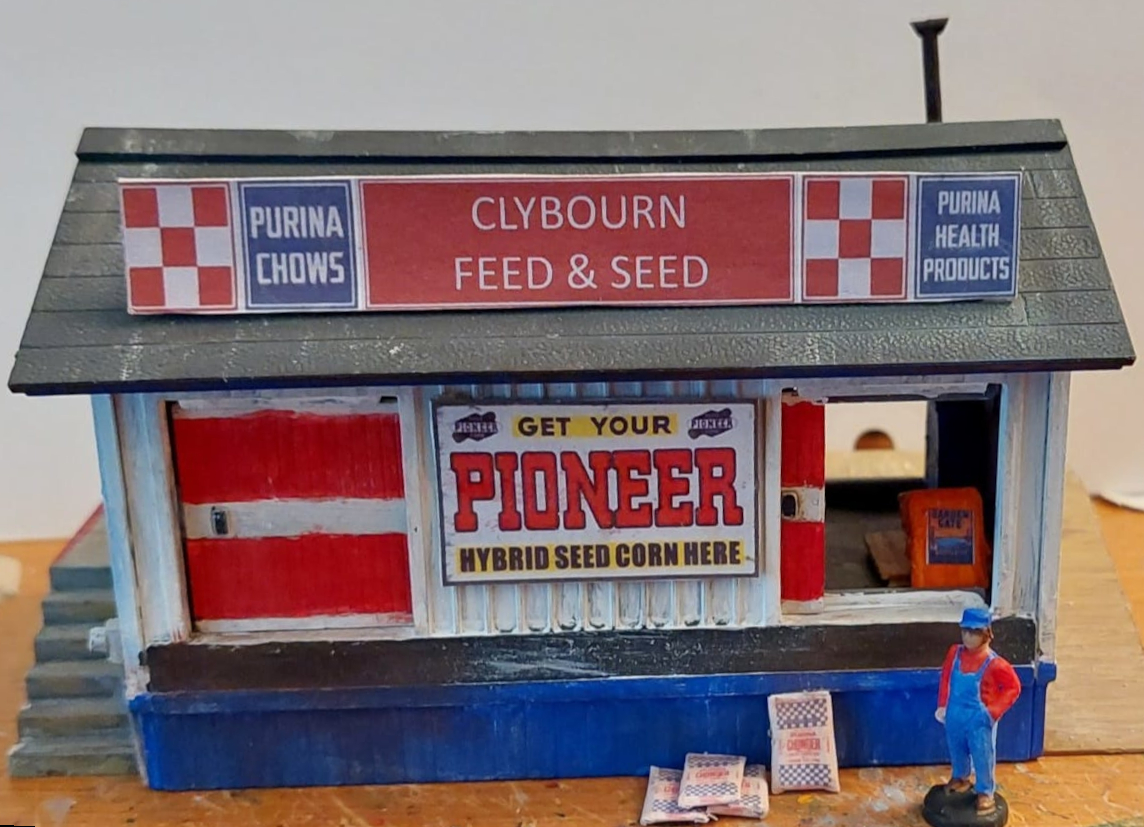
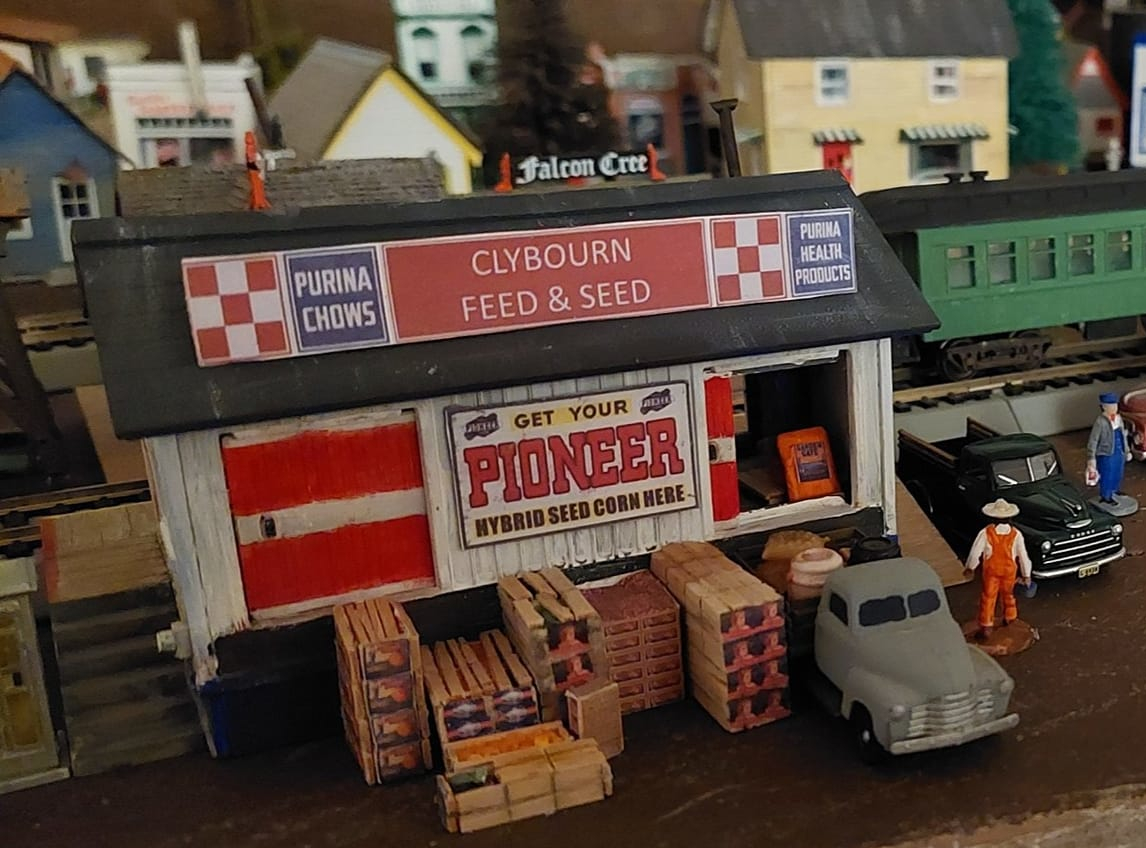 Clybourn Project |
Clybourn freight station is a ubiquitous Plasticville building. I got one in a box of "junk" buildings at a trainshow, and refurbished it after being inspired by another model railroader's remake of the same building. |
| Kitbashes | |
|---|---|
| There are sometimes a fuzzy line between some of my rescues and a kitbash. My understanding is that a kitbash is primarily assembling one or more kits together in a way that was not originally intended. Often extra long engine houses and factories on people's layouts are examples. The fun of this is you produce a unique structure that fits in with existing kits. |
| Scratchbuilding/Scrapbuilding | |||
|---|---|---|---|
| Scratchbuilding usually implies creating a structure (or car, locomotive, etc.) from basic materials rather than from a kit. My little joke is calling it scrapbuilding because I reuse household items and pieces left from the scraps of building other things and transform them into something that will go on my layout. I've made complete structures using primarily wooden coffee stirrers and magazine inserts. Scratch/scrapbuilding for me is creating something from what other people would consider virtually nothing. | |||
| Coal Loads | |||
|---|---|---|---|

The plastic inserts that come with old RTR cars didn't look nice to me. Some are very shiny and you can tell they are molded lumps. They also are not universally interchangable. I have several Tyco cars that have been redone for Central, and I wanted loads for them. |
Blue board insulation is my for the load. It is easy to cut and shape. |
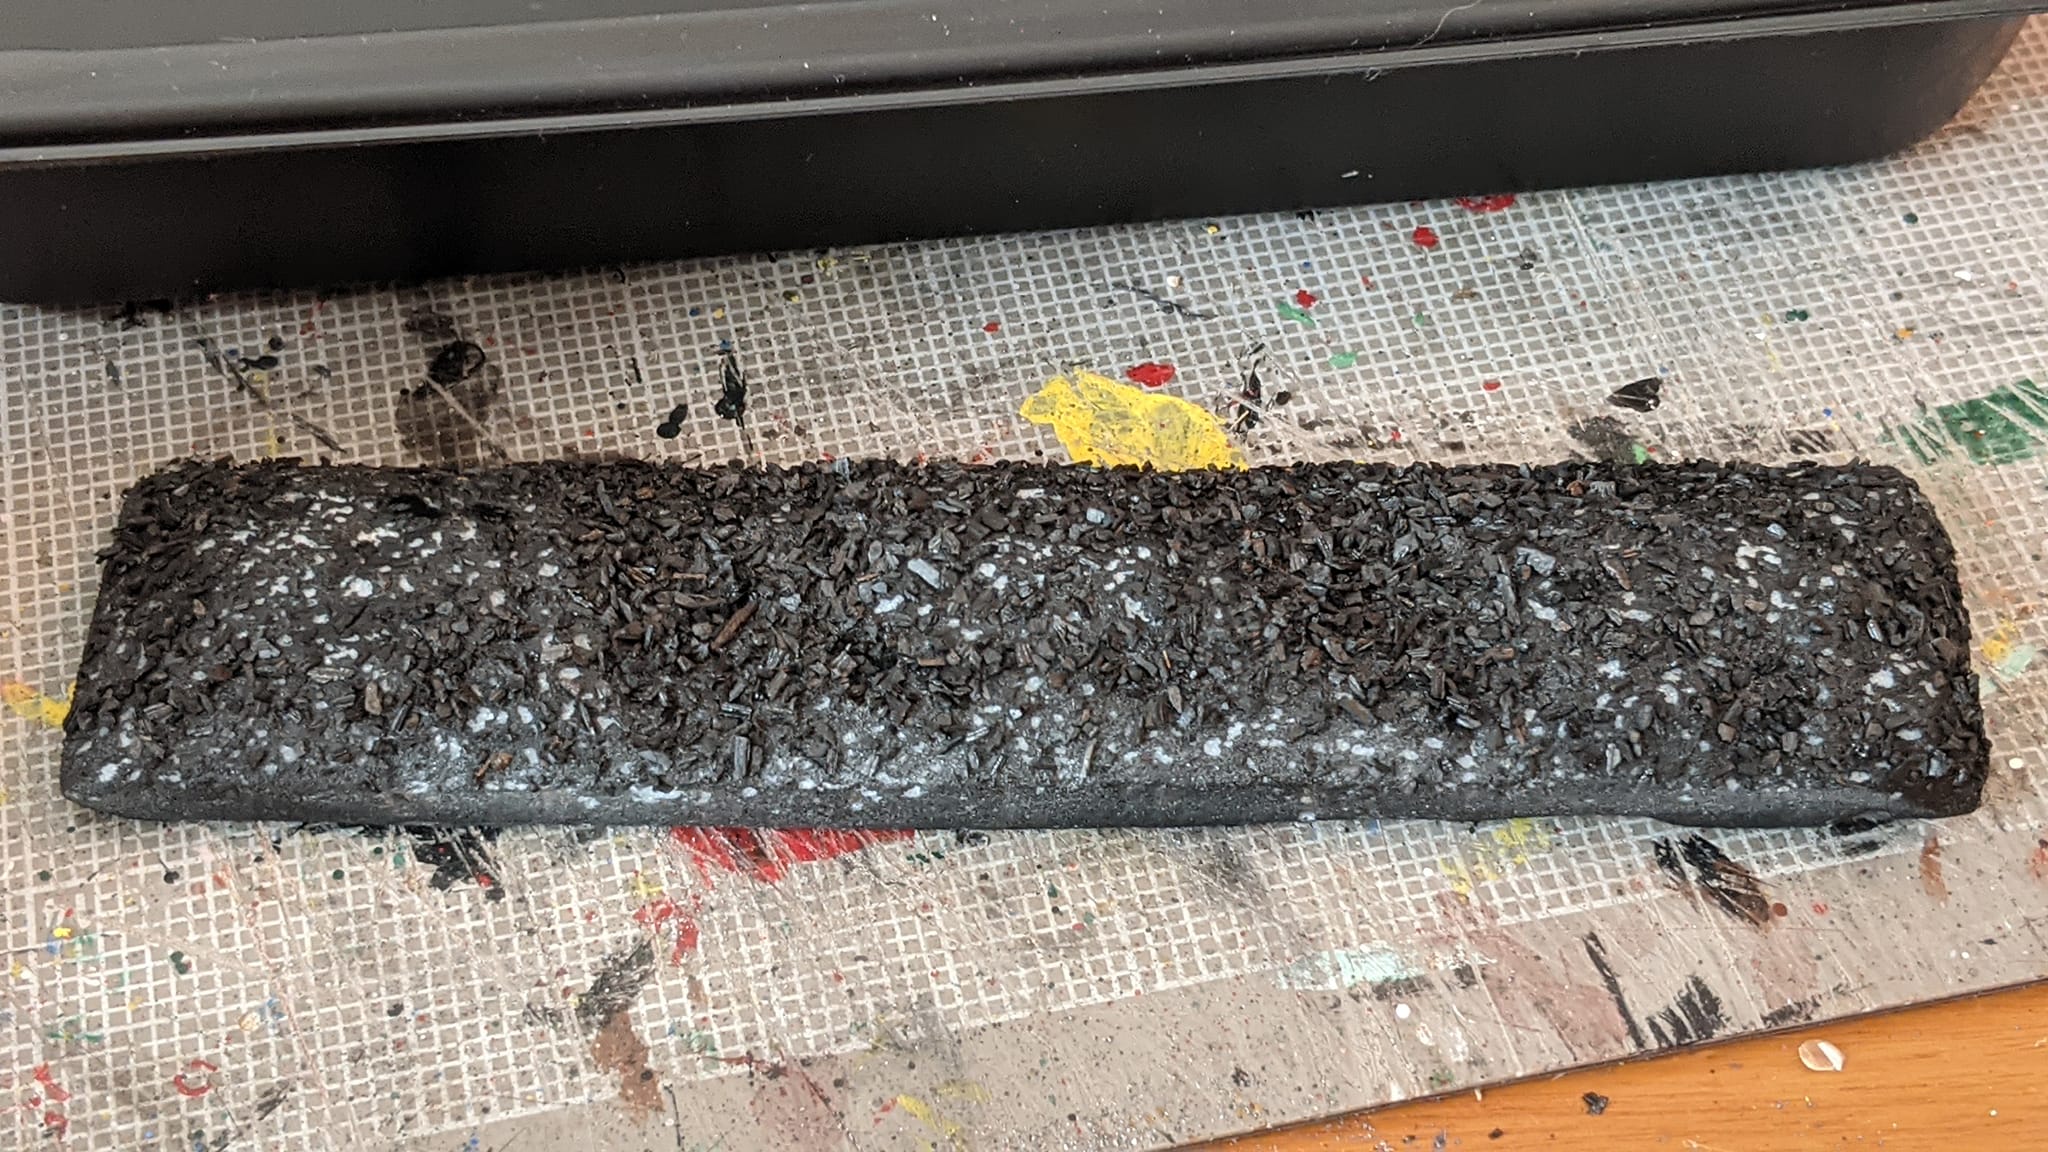
Paint the top surface black with flat acrylic paint. You can dump scale coal on it while it is wet, or wait for the paint to dry then glue down a layer of coal. *NOTE: most VOC-based paint will eat the styrofoam. Latex/acrylic is best. |
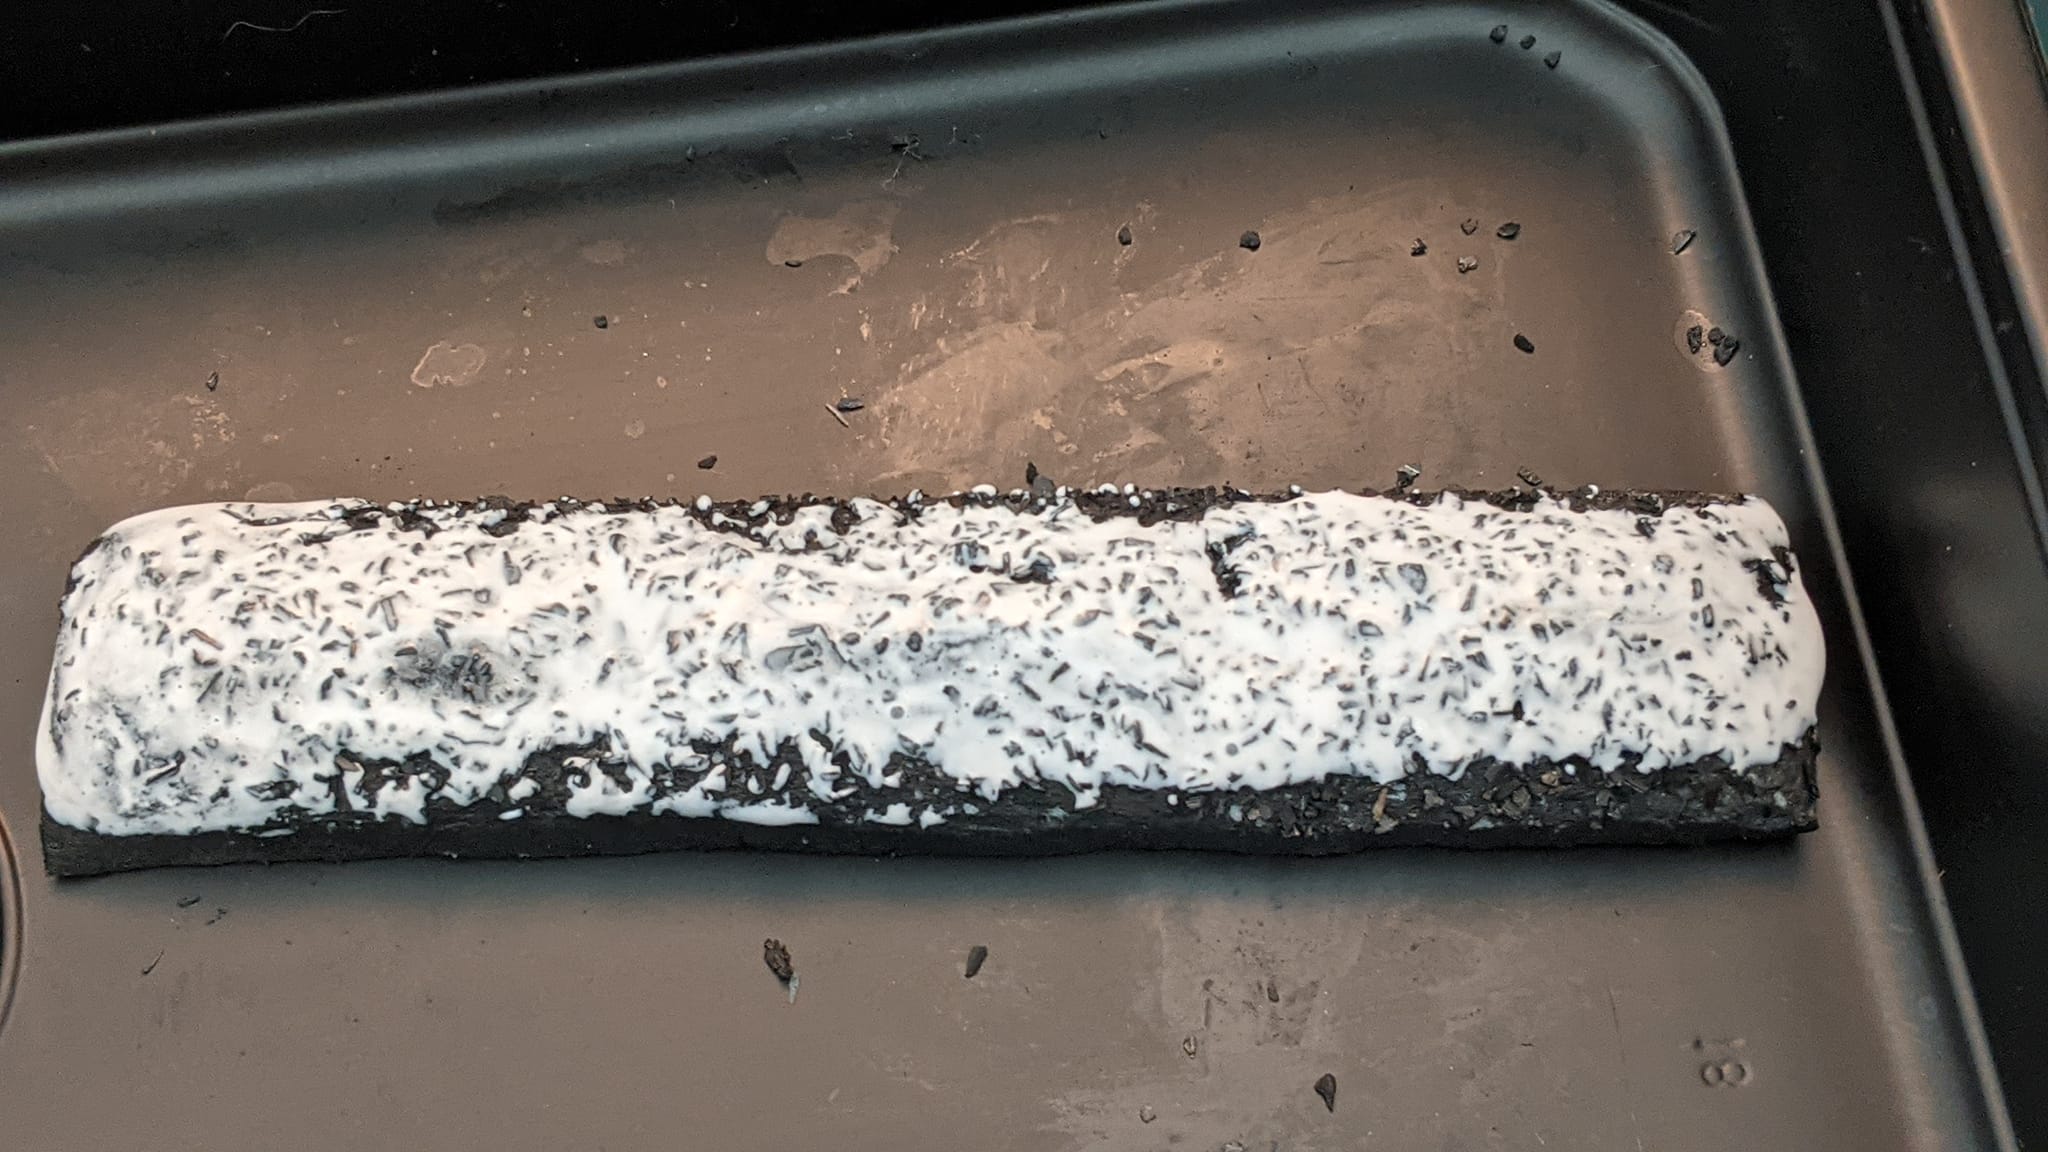
Personally, I felt one layer was insufficient, so I loaded up the surface with glue and added a second layer. |

|
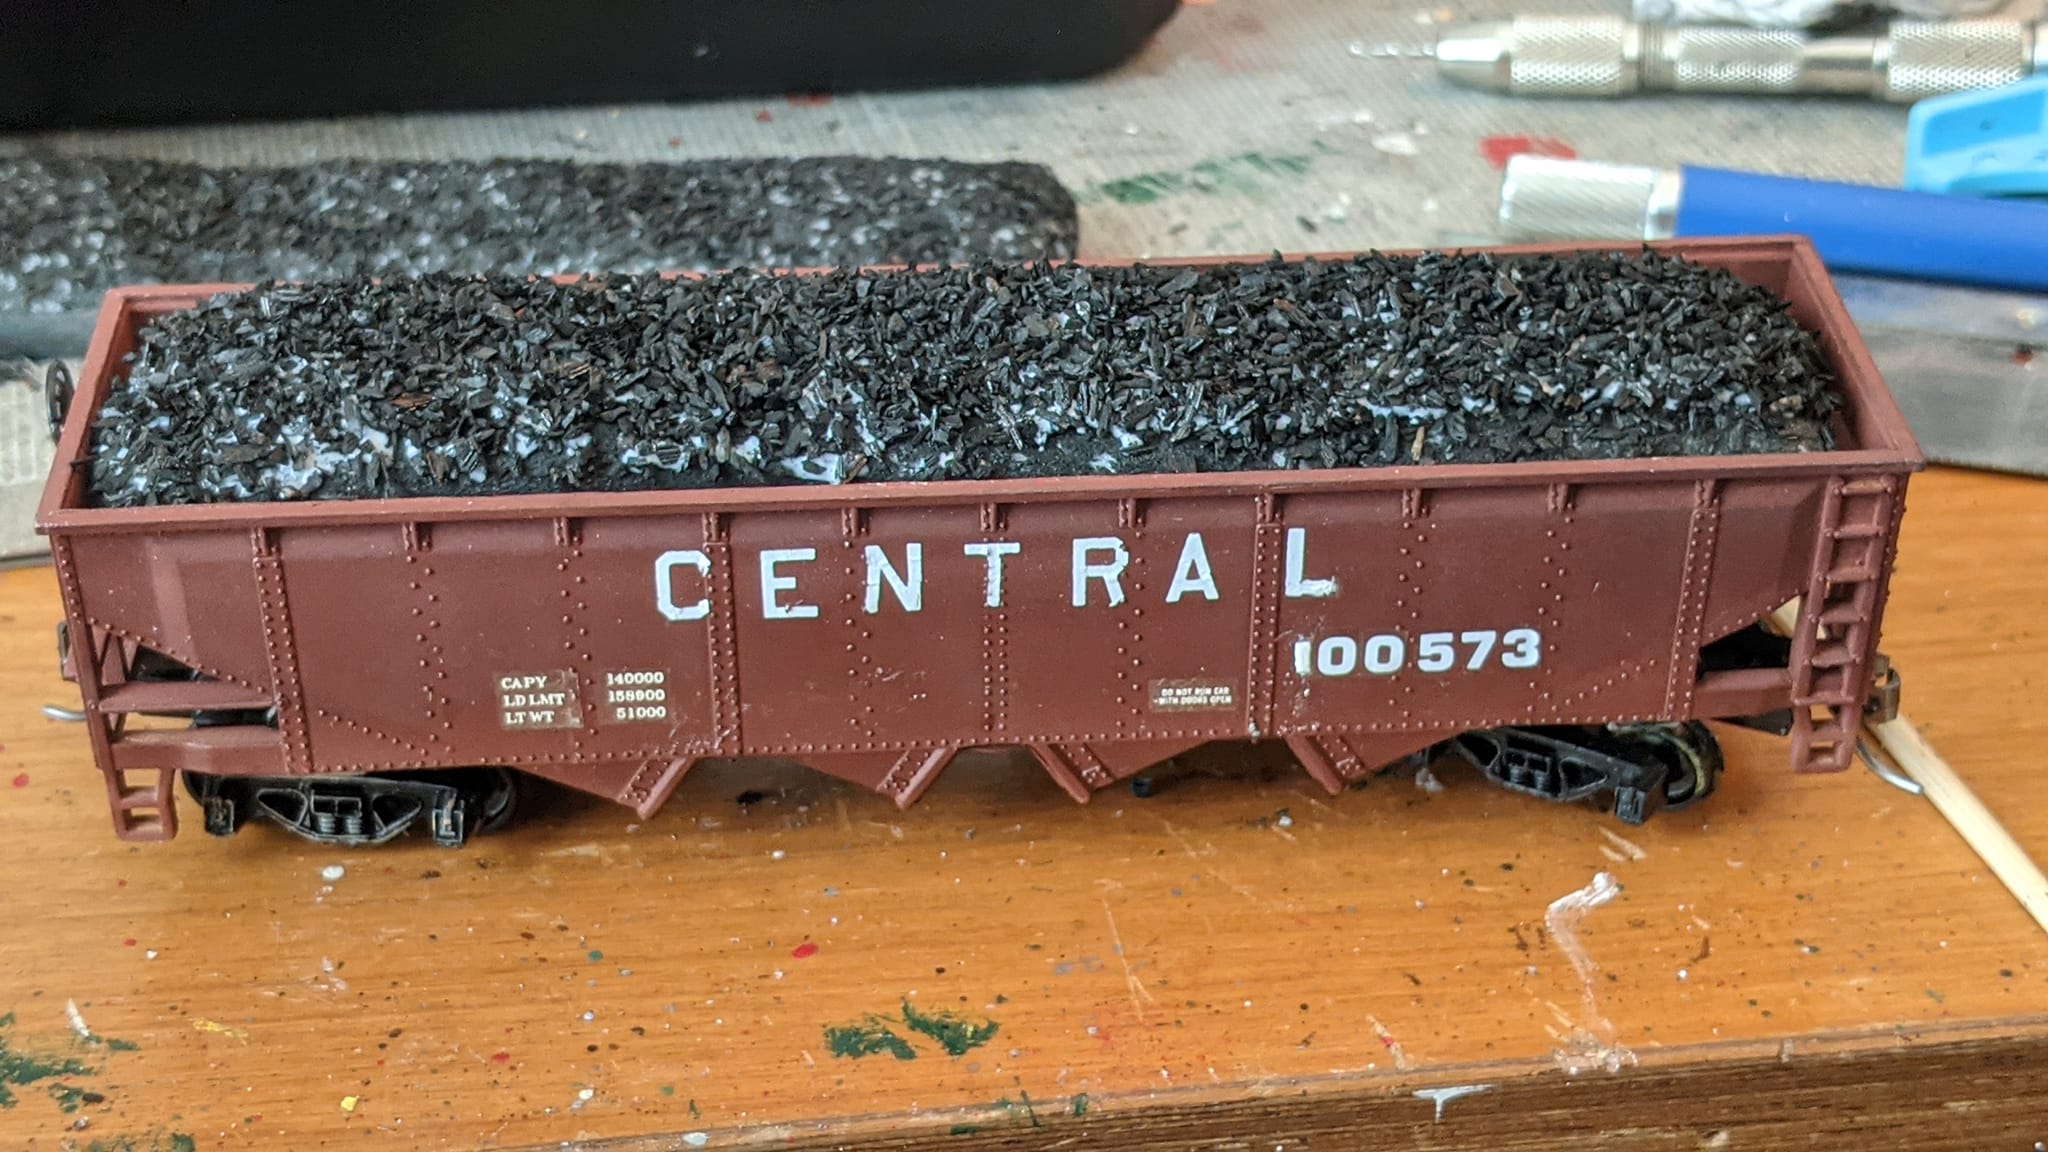
Central 100573 is loaded and ready for service. I don't bother to glue the loads into the hoppers permanently. I have it in my head that I want removable loads. We'll see how practical that is.... |
||
| Oil Barrels | ||||
|---|---|---|---|---|
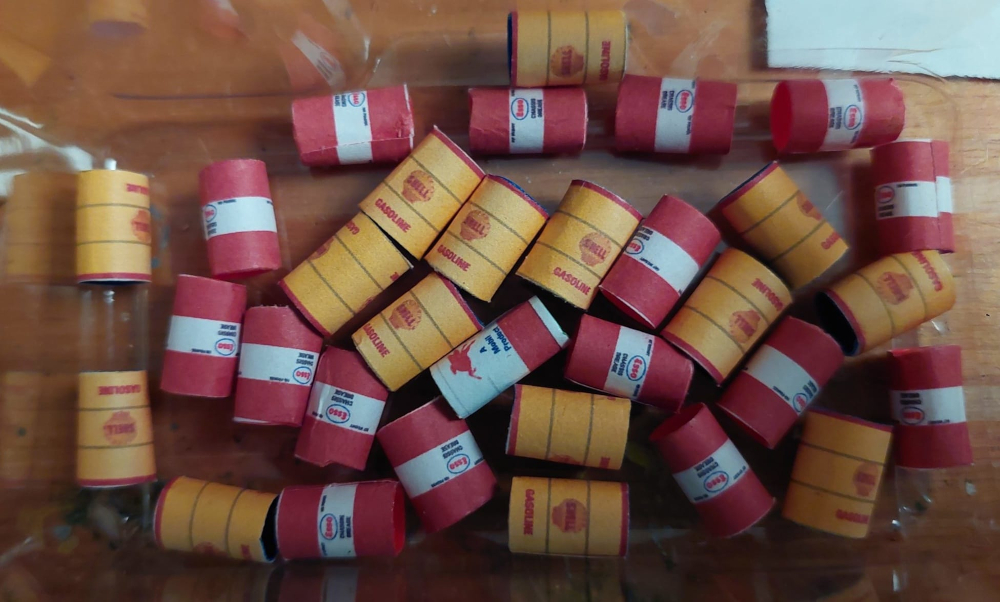 Oil Barrels |
I have several plastic oil barrels accumulated as spares from kits over the years, but they are a bit annoying to paint, and labeling them with realistic brands and logos is a tedious exercise--especially if I need some in bulk for an oil dealer or a freight load. My method is quick, reasonably easy for HO scale, and is almost zero cost. | |||
| Paper Accessories | |||
|---|---|---|---|
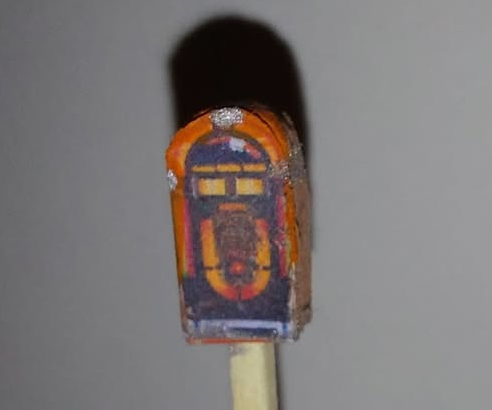
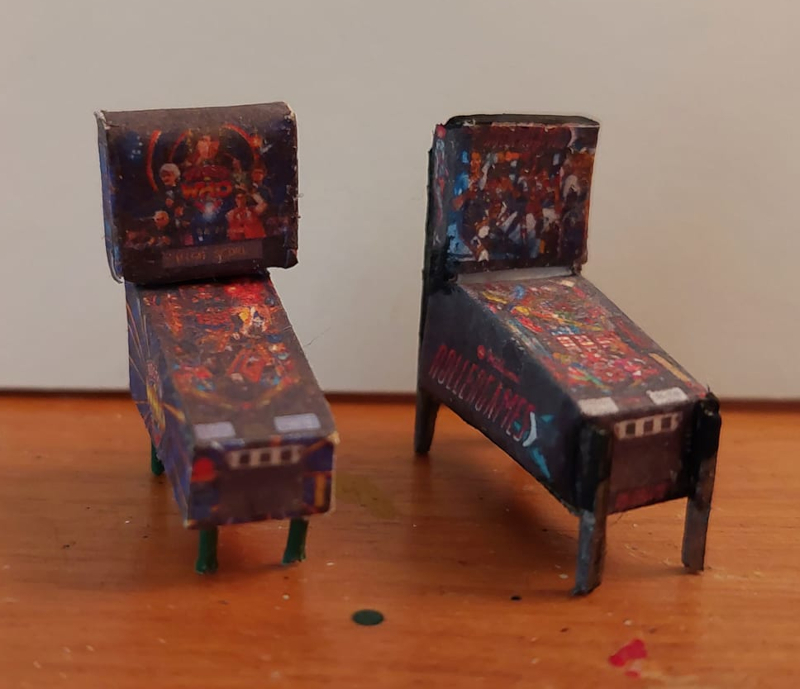
| After getting sticker shock at the prices of commercially available accessories, I started thinking a bit old school in terms of model railroading. People made things from wood, paper, and metal before plastic took over the industry. In fact, a lot of vintage toys and early railroad models were lithographed paper. For simple shapes like boxes and rectangular areas, a paper printout achieves the same effect. I scoured the Internet for inspiration and images, then with the magic of downloaded free fonts and PowerPoint, I created my own designs to suit my needs and sense of humor. Some simple box shapes are simply paper glued onto a piece of index card, others are glued to pieces of wood I shaped to the need. | |||
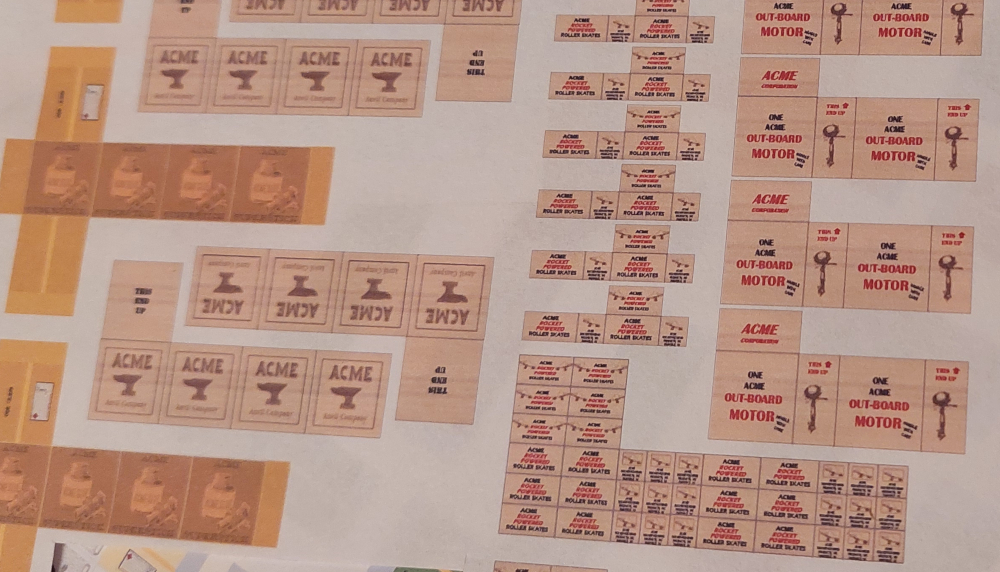 Acme shipping boxes |
 Various assembled boxes |
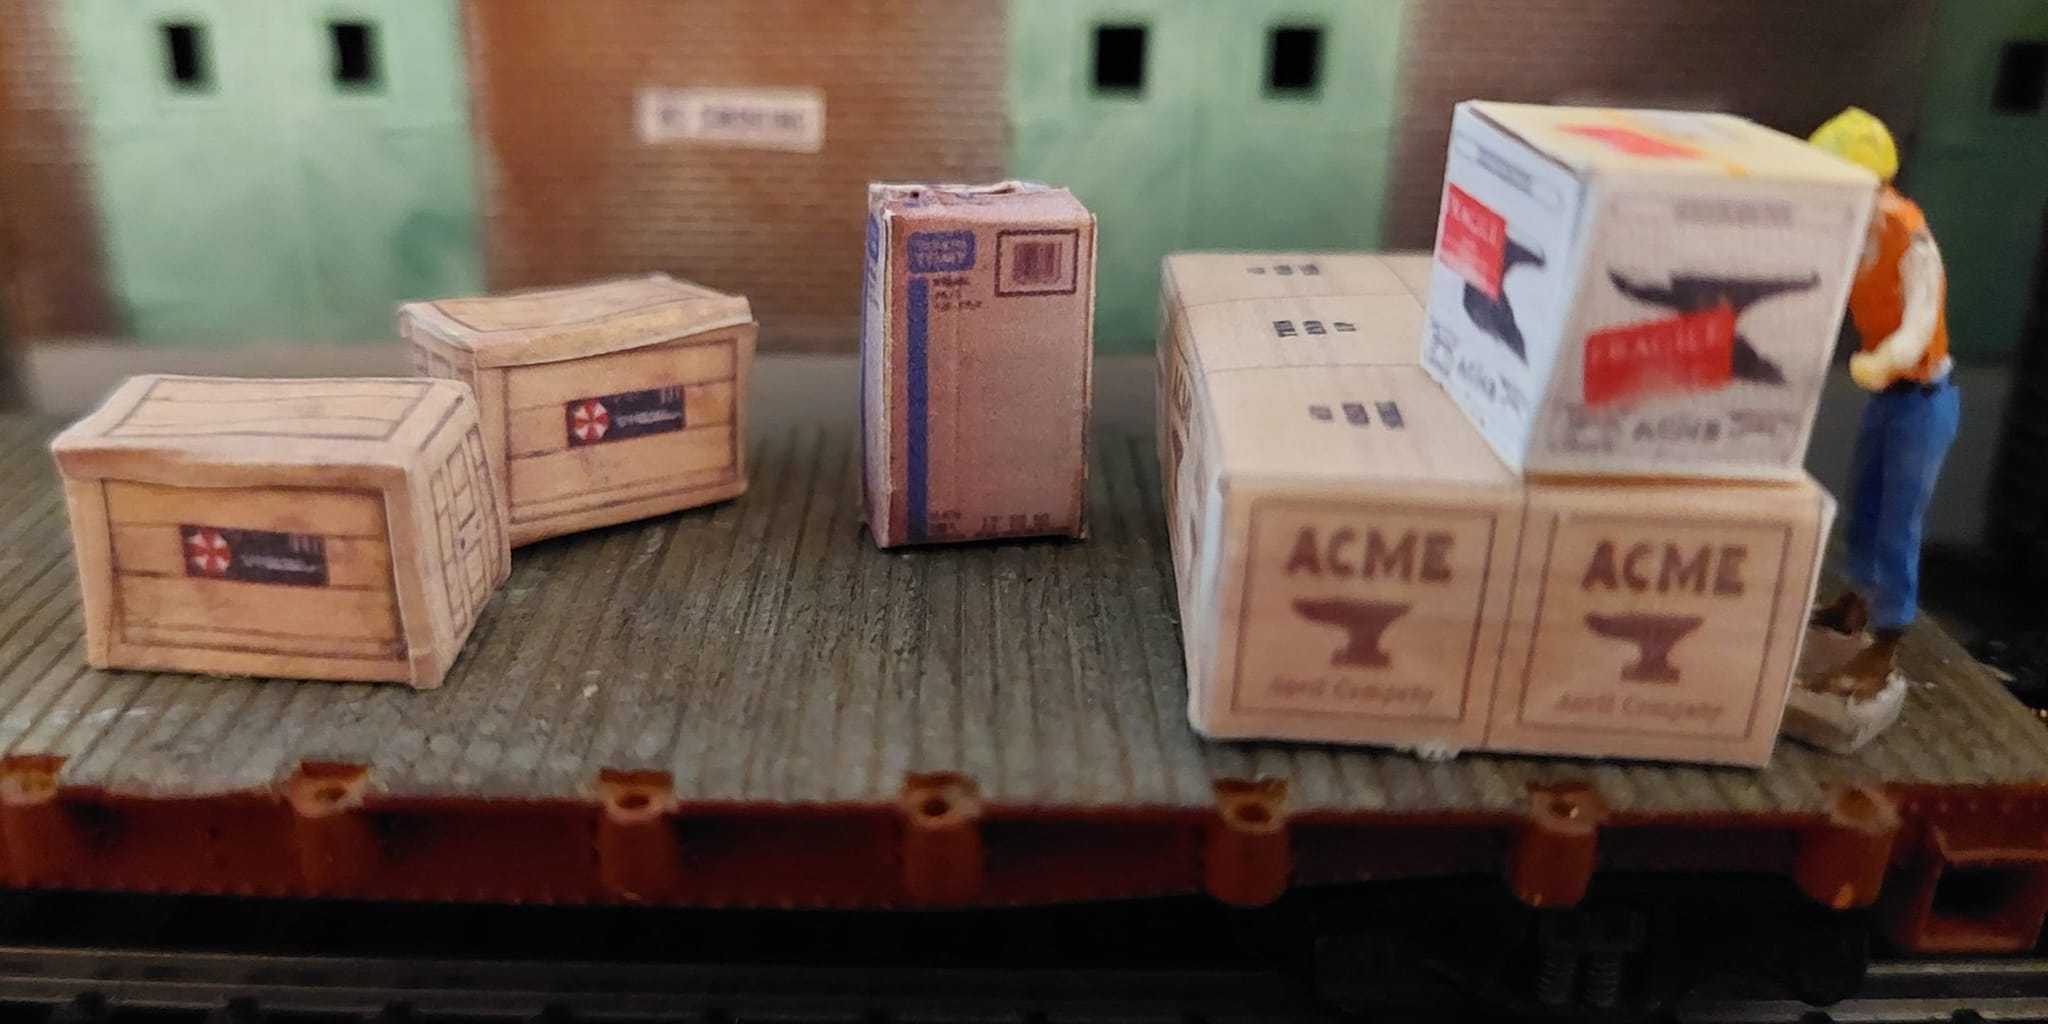 Papercraft The Umbrella Corp crates are scaled down Papercraft prints. I couldn't resist putting a "Fragile" label on an anvil crate.... |
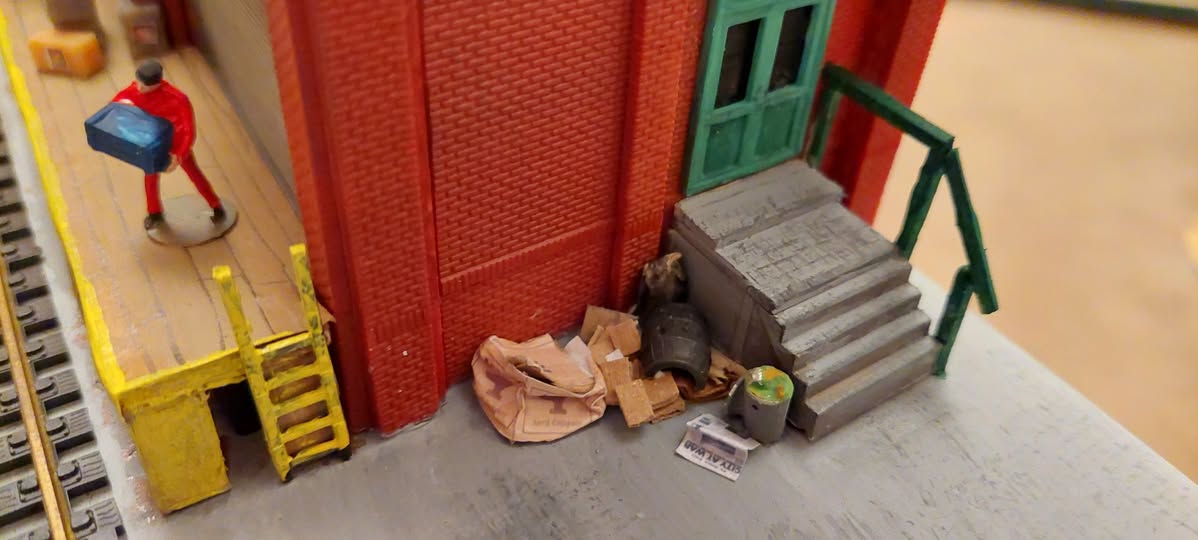 Failed assembly My early attempts at making paper boxes/crates can still be used as trash piles. |
 Feed and Seed Bags |
When you need to populate an industry or store with several copies of the same item (such as feed and seed bags), buying, painting, and
decaling them is a tedious business. I have a solution that is extremely low cost, looks good, and is a little faster. It just involves
paper and glue and a little effort in graphics program. ← Click link to see project |
||
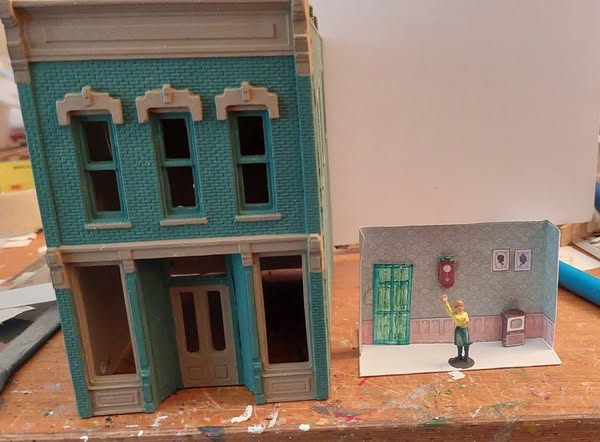 Shadowbox interior Not every building needs a full interior. A shadowbox hints at an apartment over the store. |
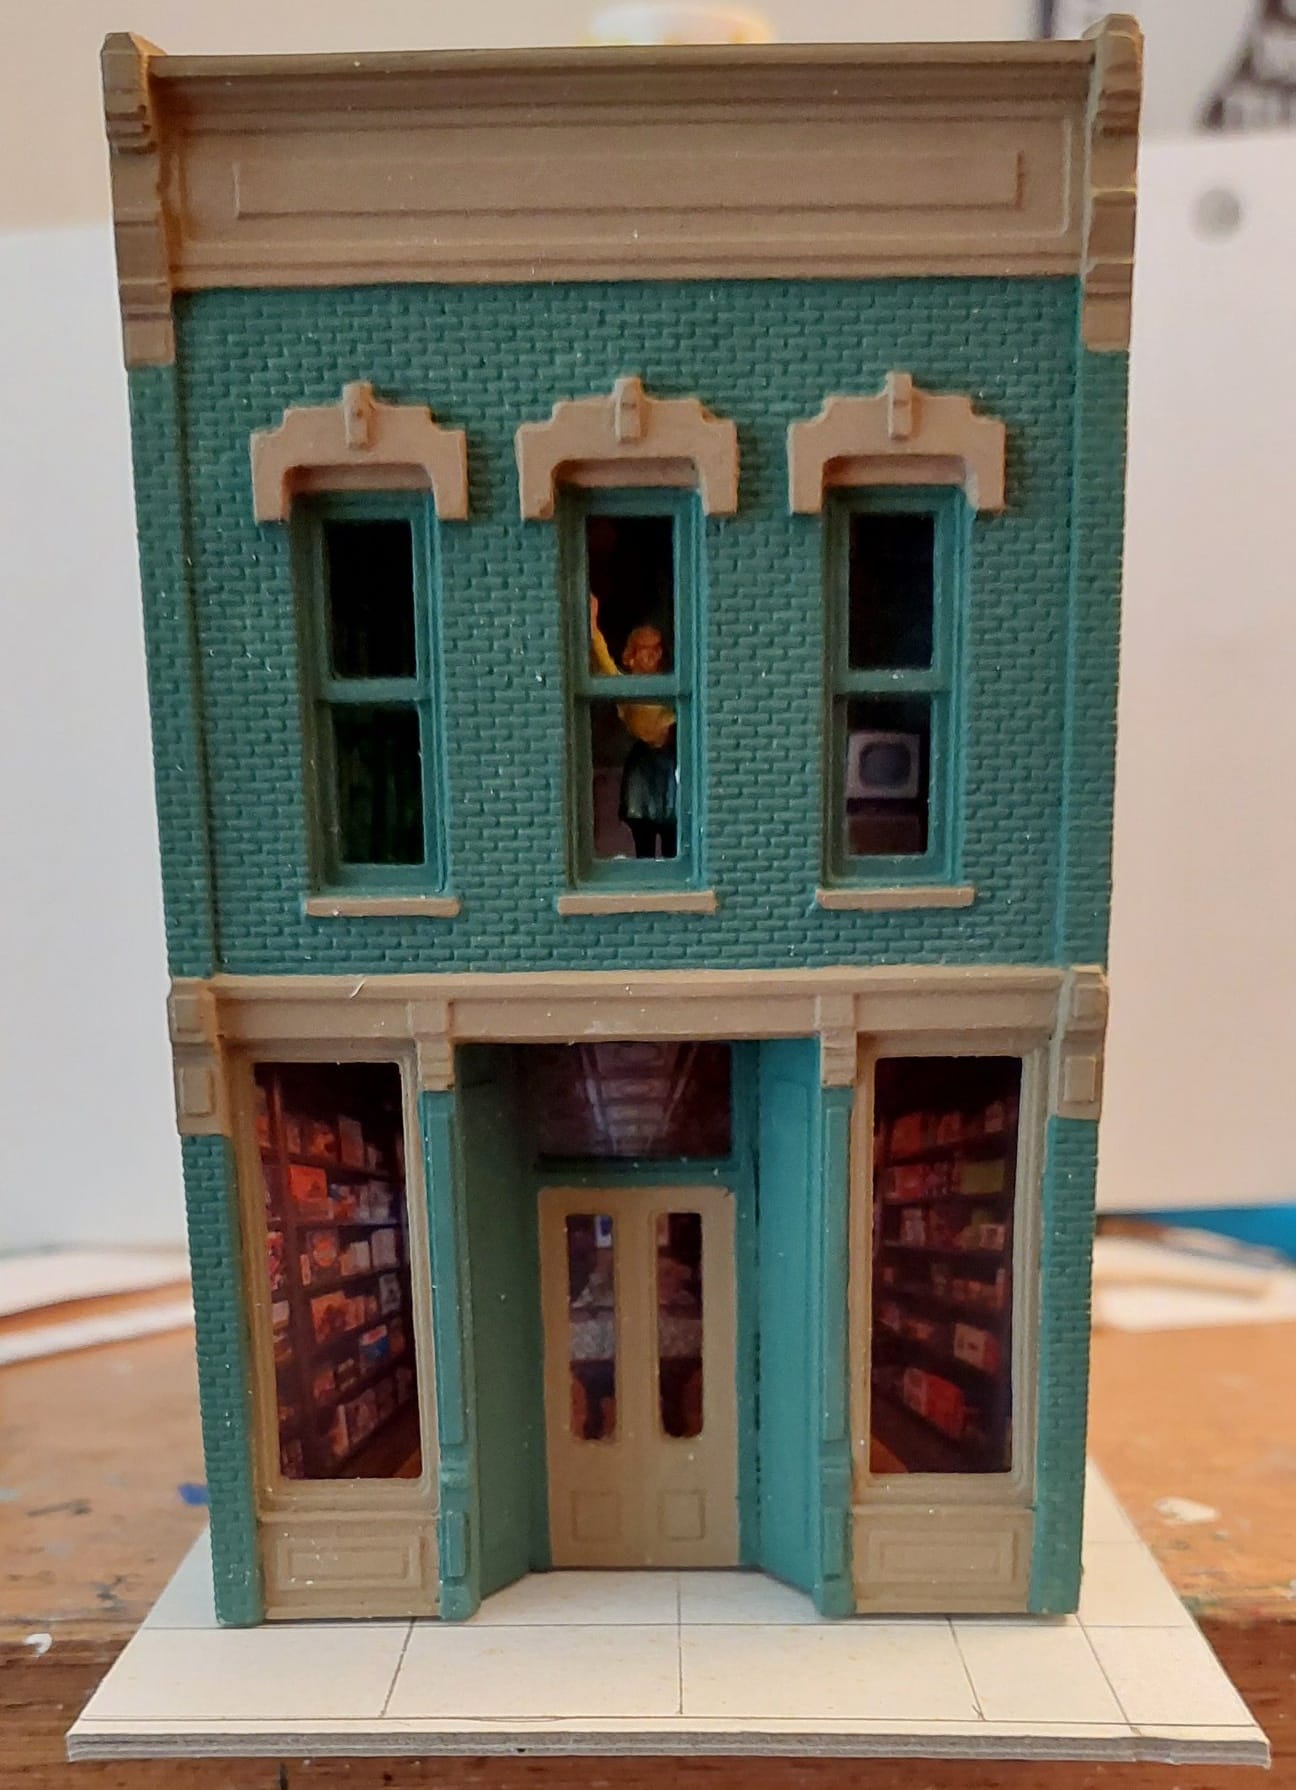 Photo = instant business A scaled and printed photo of a store interior implies a business. By printing a photo wider than the storefront and mounting the edges to the side walls gives an extra element of depth to the interior and it looks better to me than a photo glued flat behind the glass. |
||
| Scraps to Accessories | |||
|---|---|---|---|
| Being able to reuse, recycle, repurpose, or reimagine items is a great way to stay within a budget, exercise some creativity, and prevent things from going into the landfill. I have found a ton of uses for things that might have been discarded because I could see the potential in the shapes. Old sprues, bottles, scraps of wire, matchsticks, coffee stirrers. Some are quick and easy like turning Kadee coupler box sprues into fire hydrants. Others require a bit more creativity and time, but still can be effective. | |||
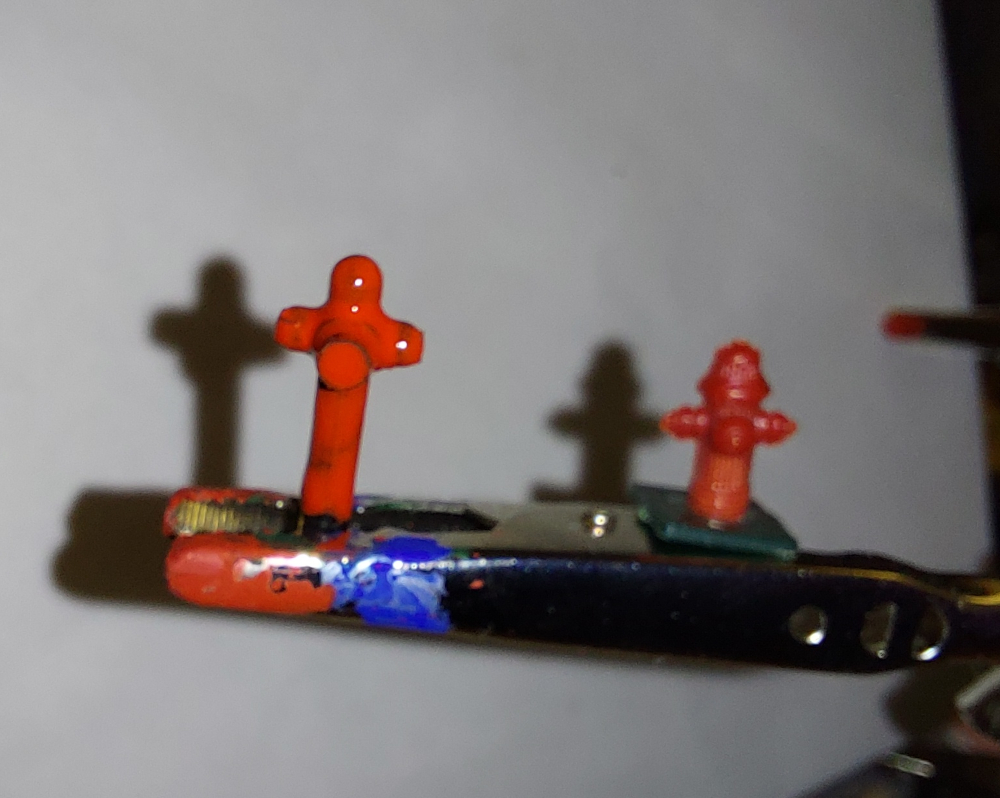 Kadee sprue becomes a hydrant Commercial hydrant from a scenery pack for comparison |
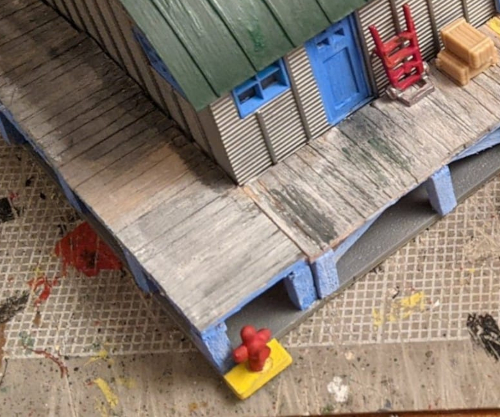 Hydrant in place |
 Scotch Tape spools become tanks |
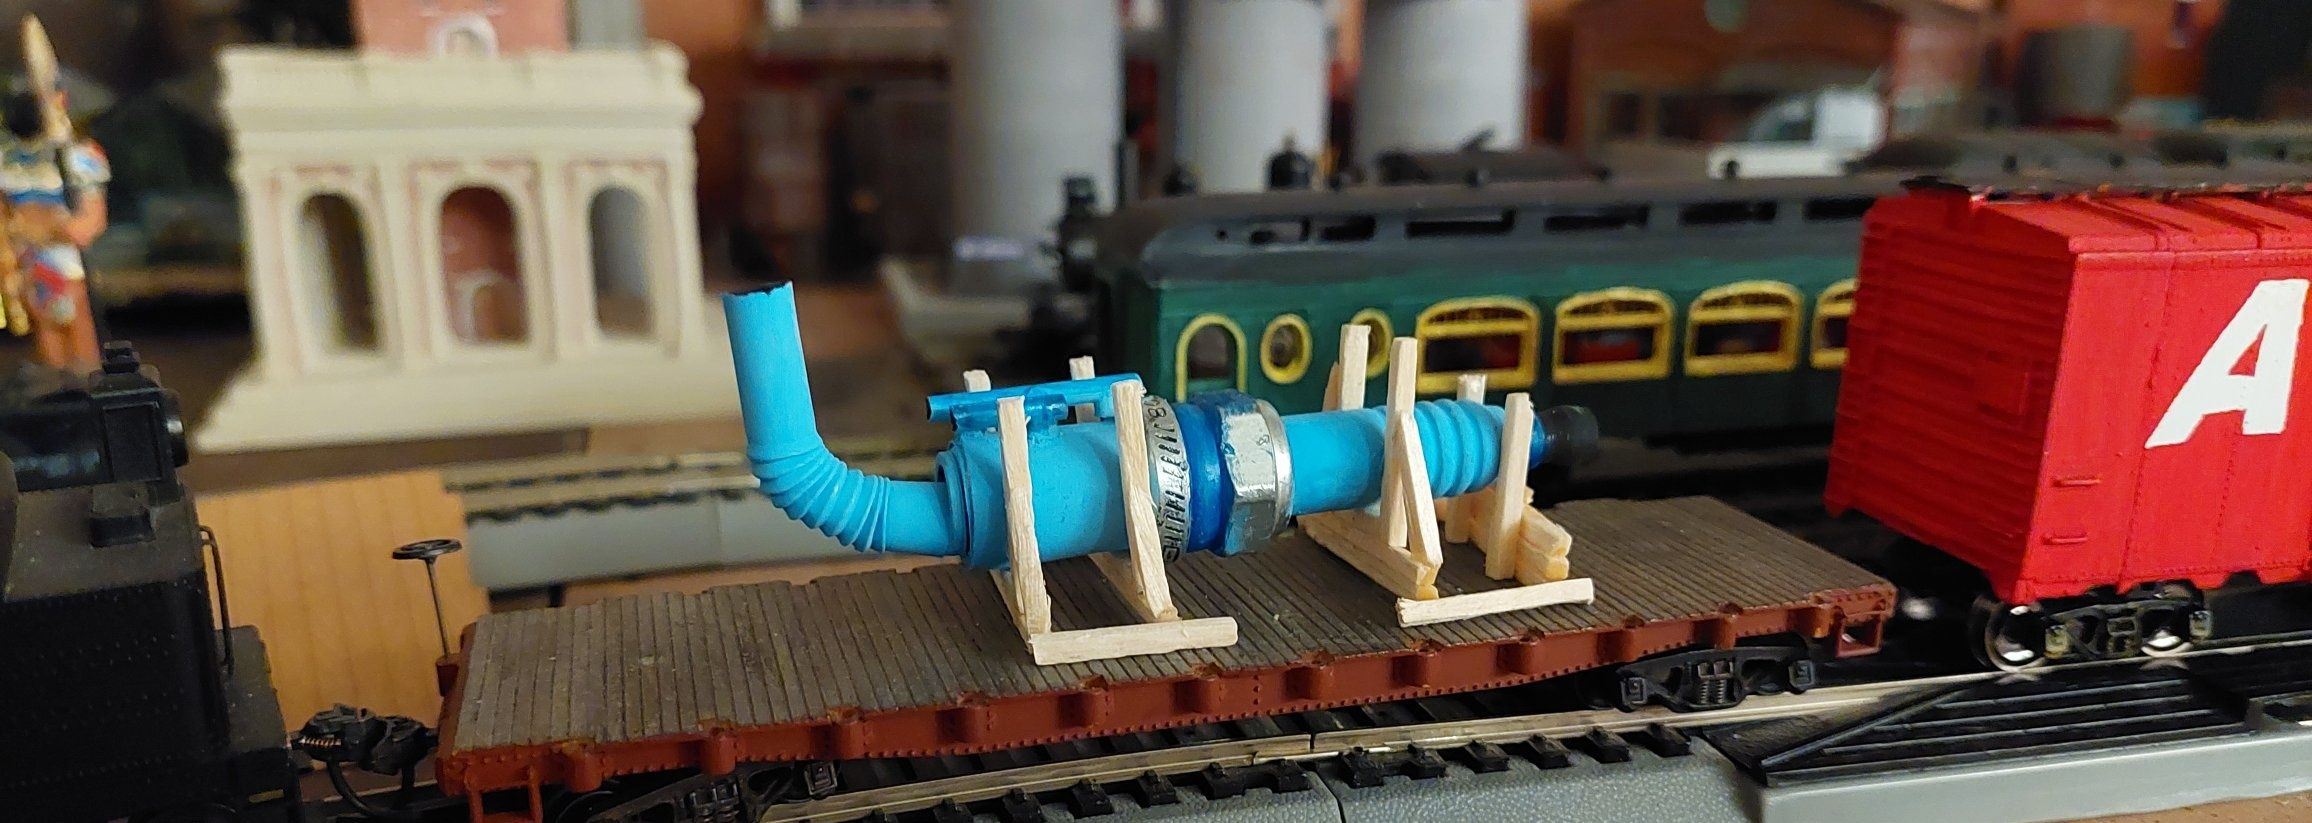 Used spark plug reimagined as a load Paint. Matchsticks form the cradle. Bendy straw for the exhaust. |
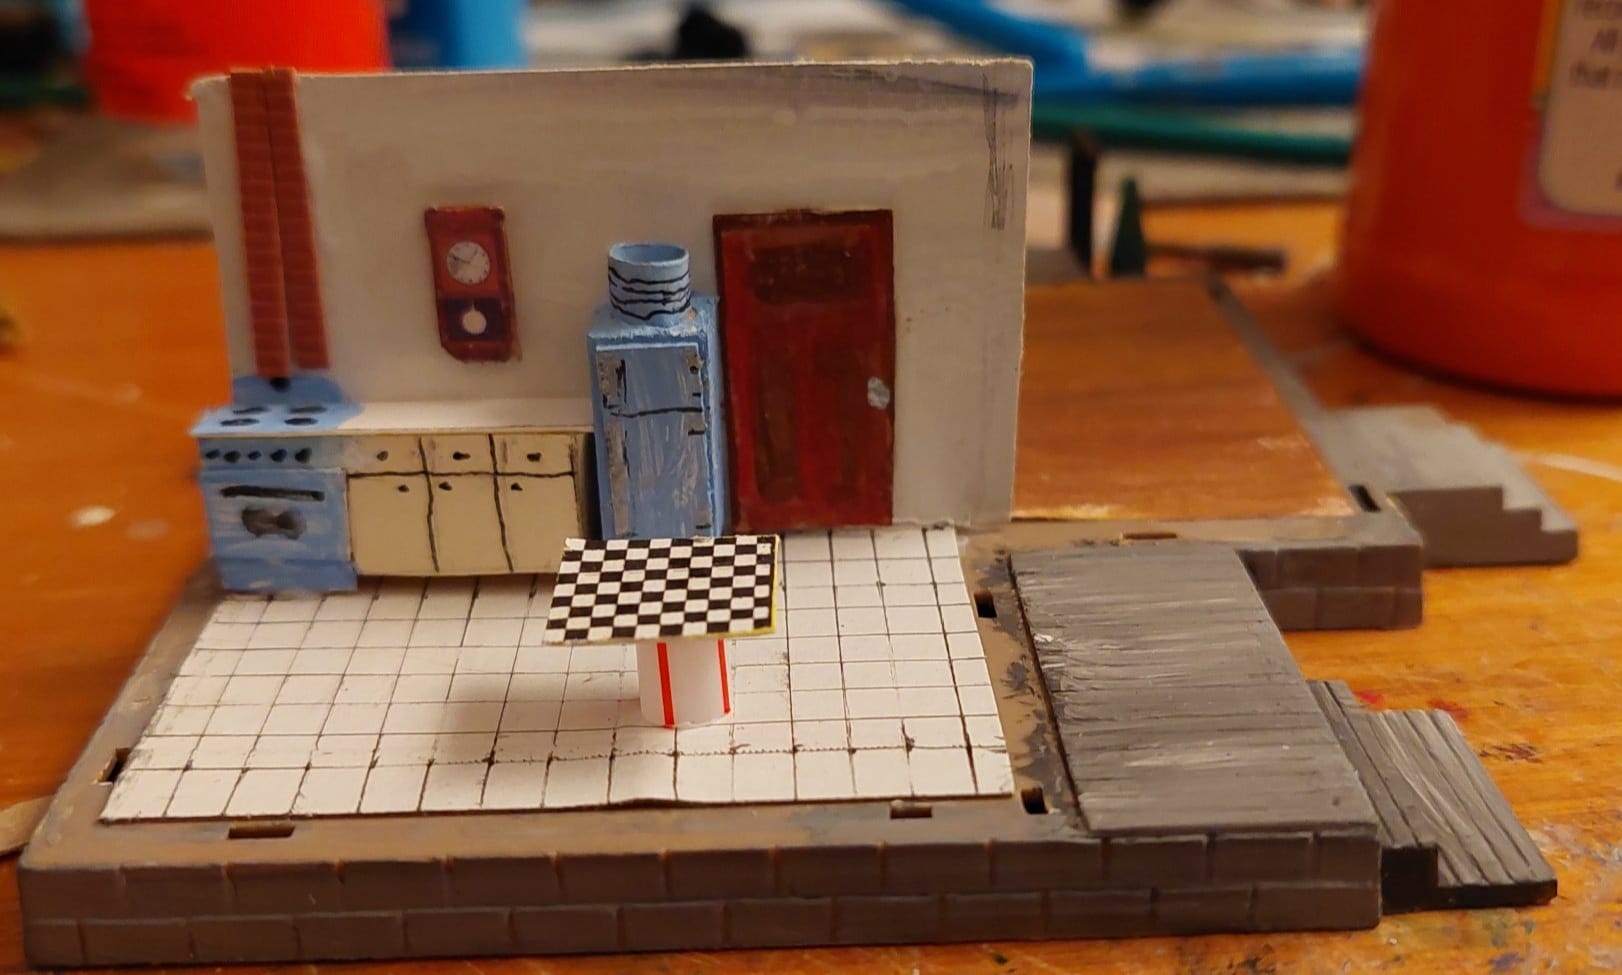 Kitchen from scraps Just enough detail to hint there is something there |
|||
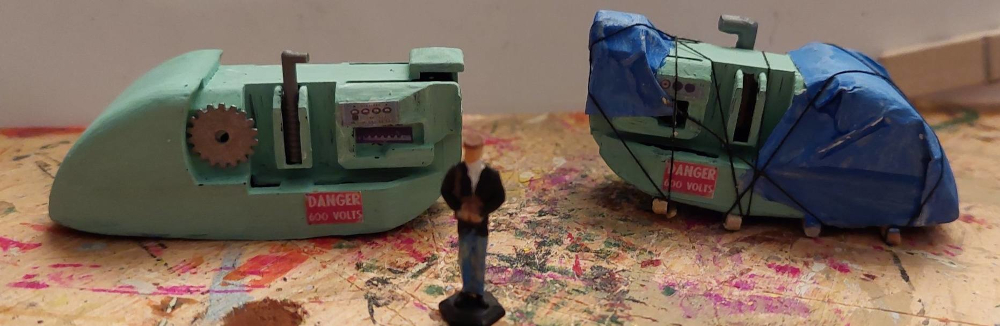 Windshield wiper clips to loads |
Replacing windshield wipers usually means you get some extra parts because not all automobiles connect them the same way. I held onto a few clips When I recently replaced some wiper blades and hung onto the clips because they had interesting shapes. I've made them into loads and scenery--with minor modifications. | ||
| Vehicles - Trucks | |
|---|---|
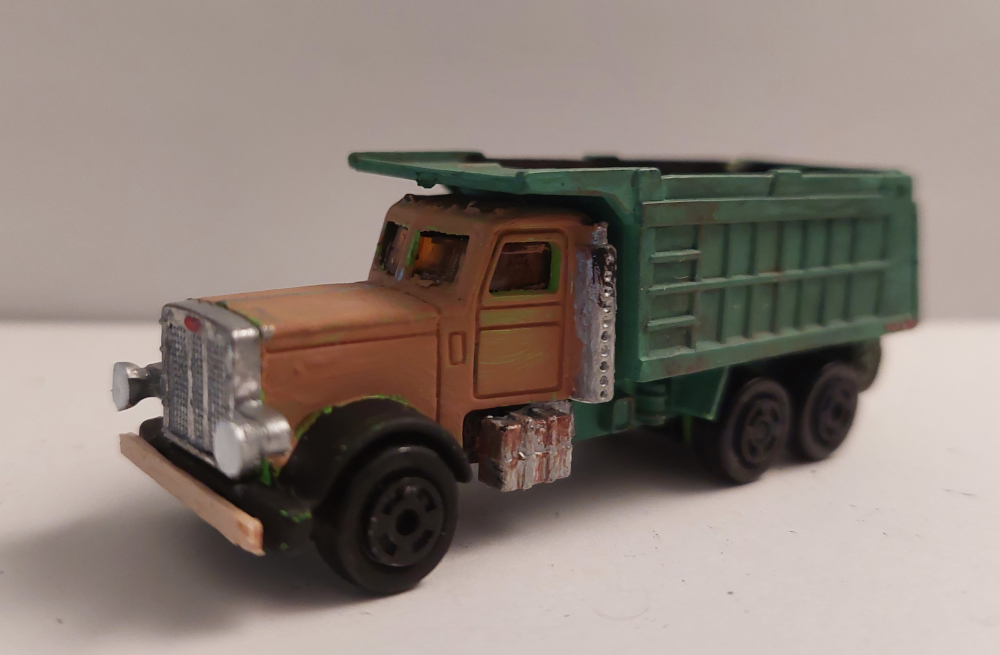 Upgrading Toy Trucks |
An old set of undersized toy semis got a bit of restyling and backdating. One truck involved mostly repainting. The other was a bit more involved. |
 Firetruck Refurbishing |
A vintage AHM firetruck I built as a pre-teen got a major overhaul and customized improvements. This was inspired by another modeler's effort. |
| Wood Props | |||
|---|---|---|---|
| In the 1990's I had some vague notion of trying my hand at scratchbuilding, so I started accumulating wooden coffee stirrers when I got my morning coffee at work. No, I didn't grab handfuls at a time, I just kept what I used to stir in the creamer. I've about depleted my cache of them with projects, but something I realized I could do to maximize the use of them was to take the cut off ends and turn them into additional accessories like pallets and fruit/vegetable crates. Matchsticks are also handy in HO scale as they are pretty close to a 4"x4" post in scale. Here are some of the things I've made with the leftover wood from other projects. Powerpoint printouts and seed beads help complete some of these. | |||
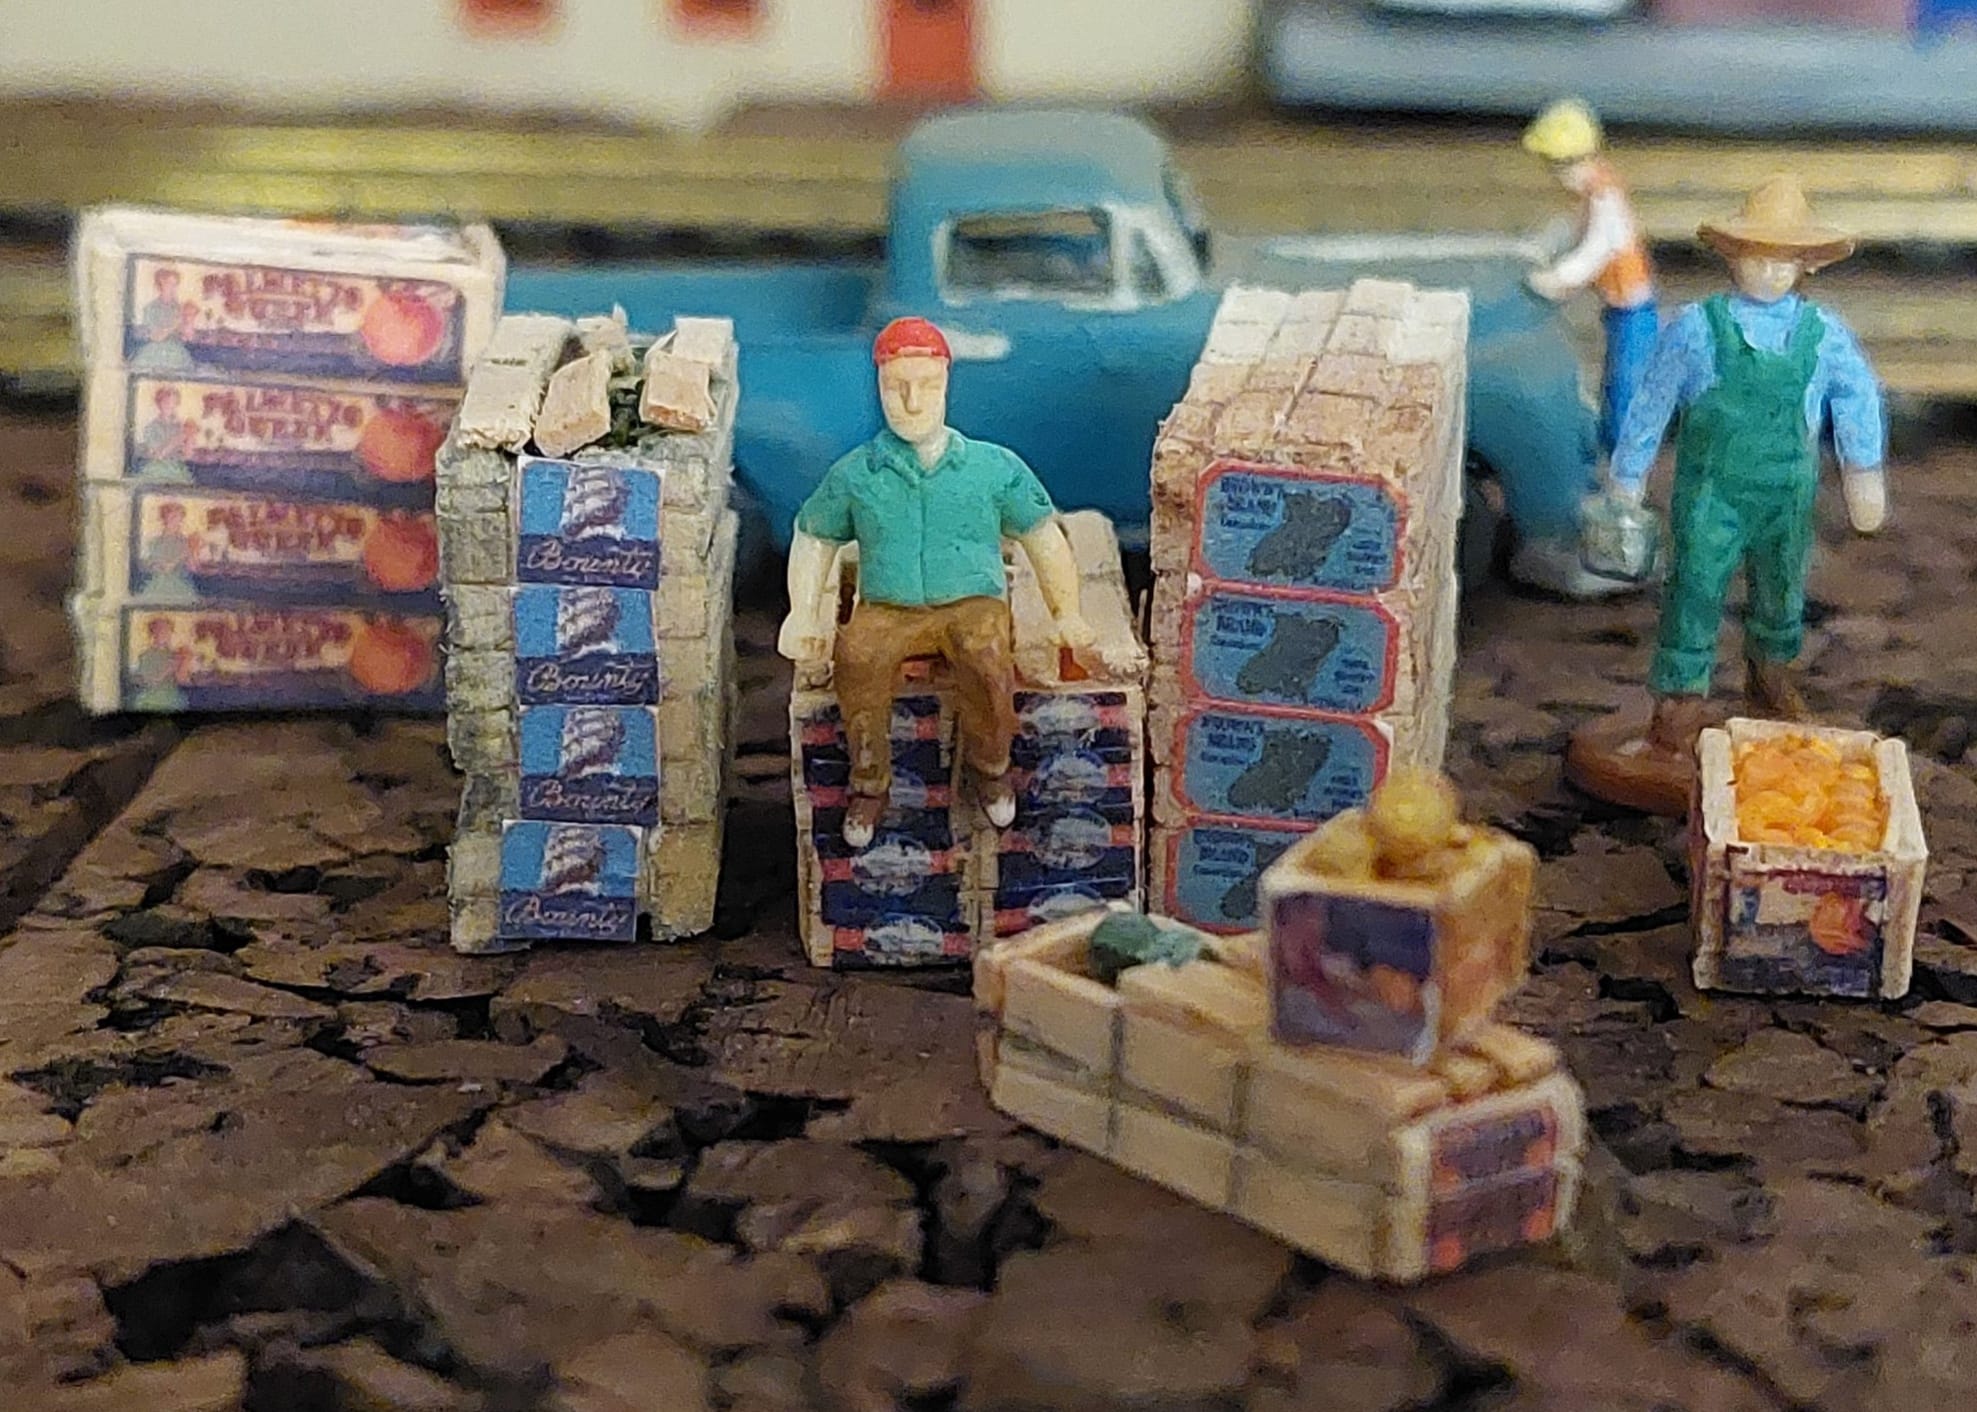 Matchsticks, printed labels, & seed beads. |
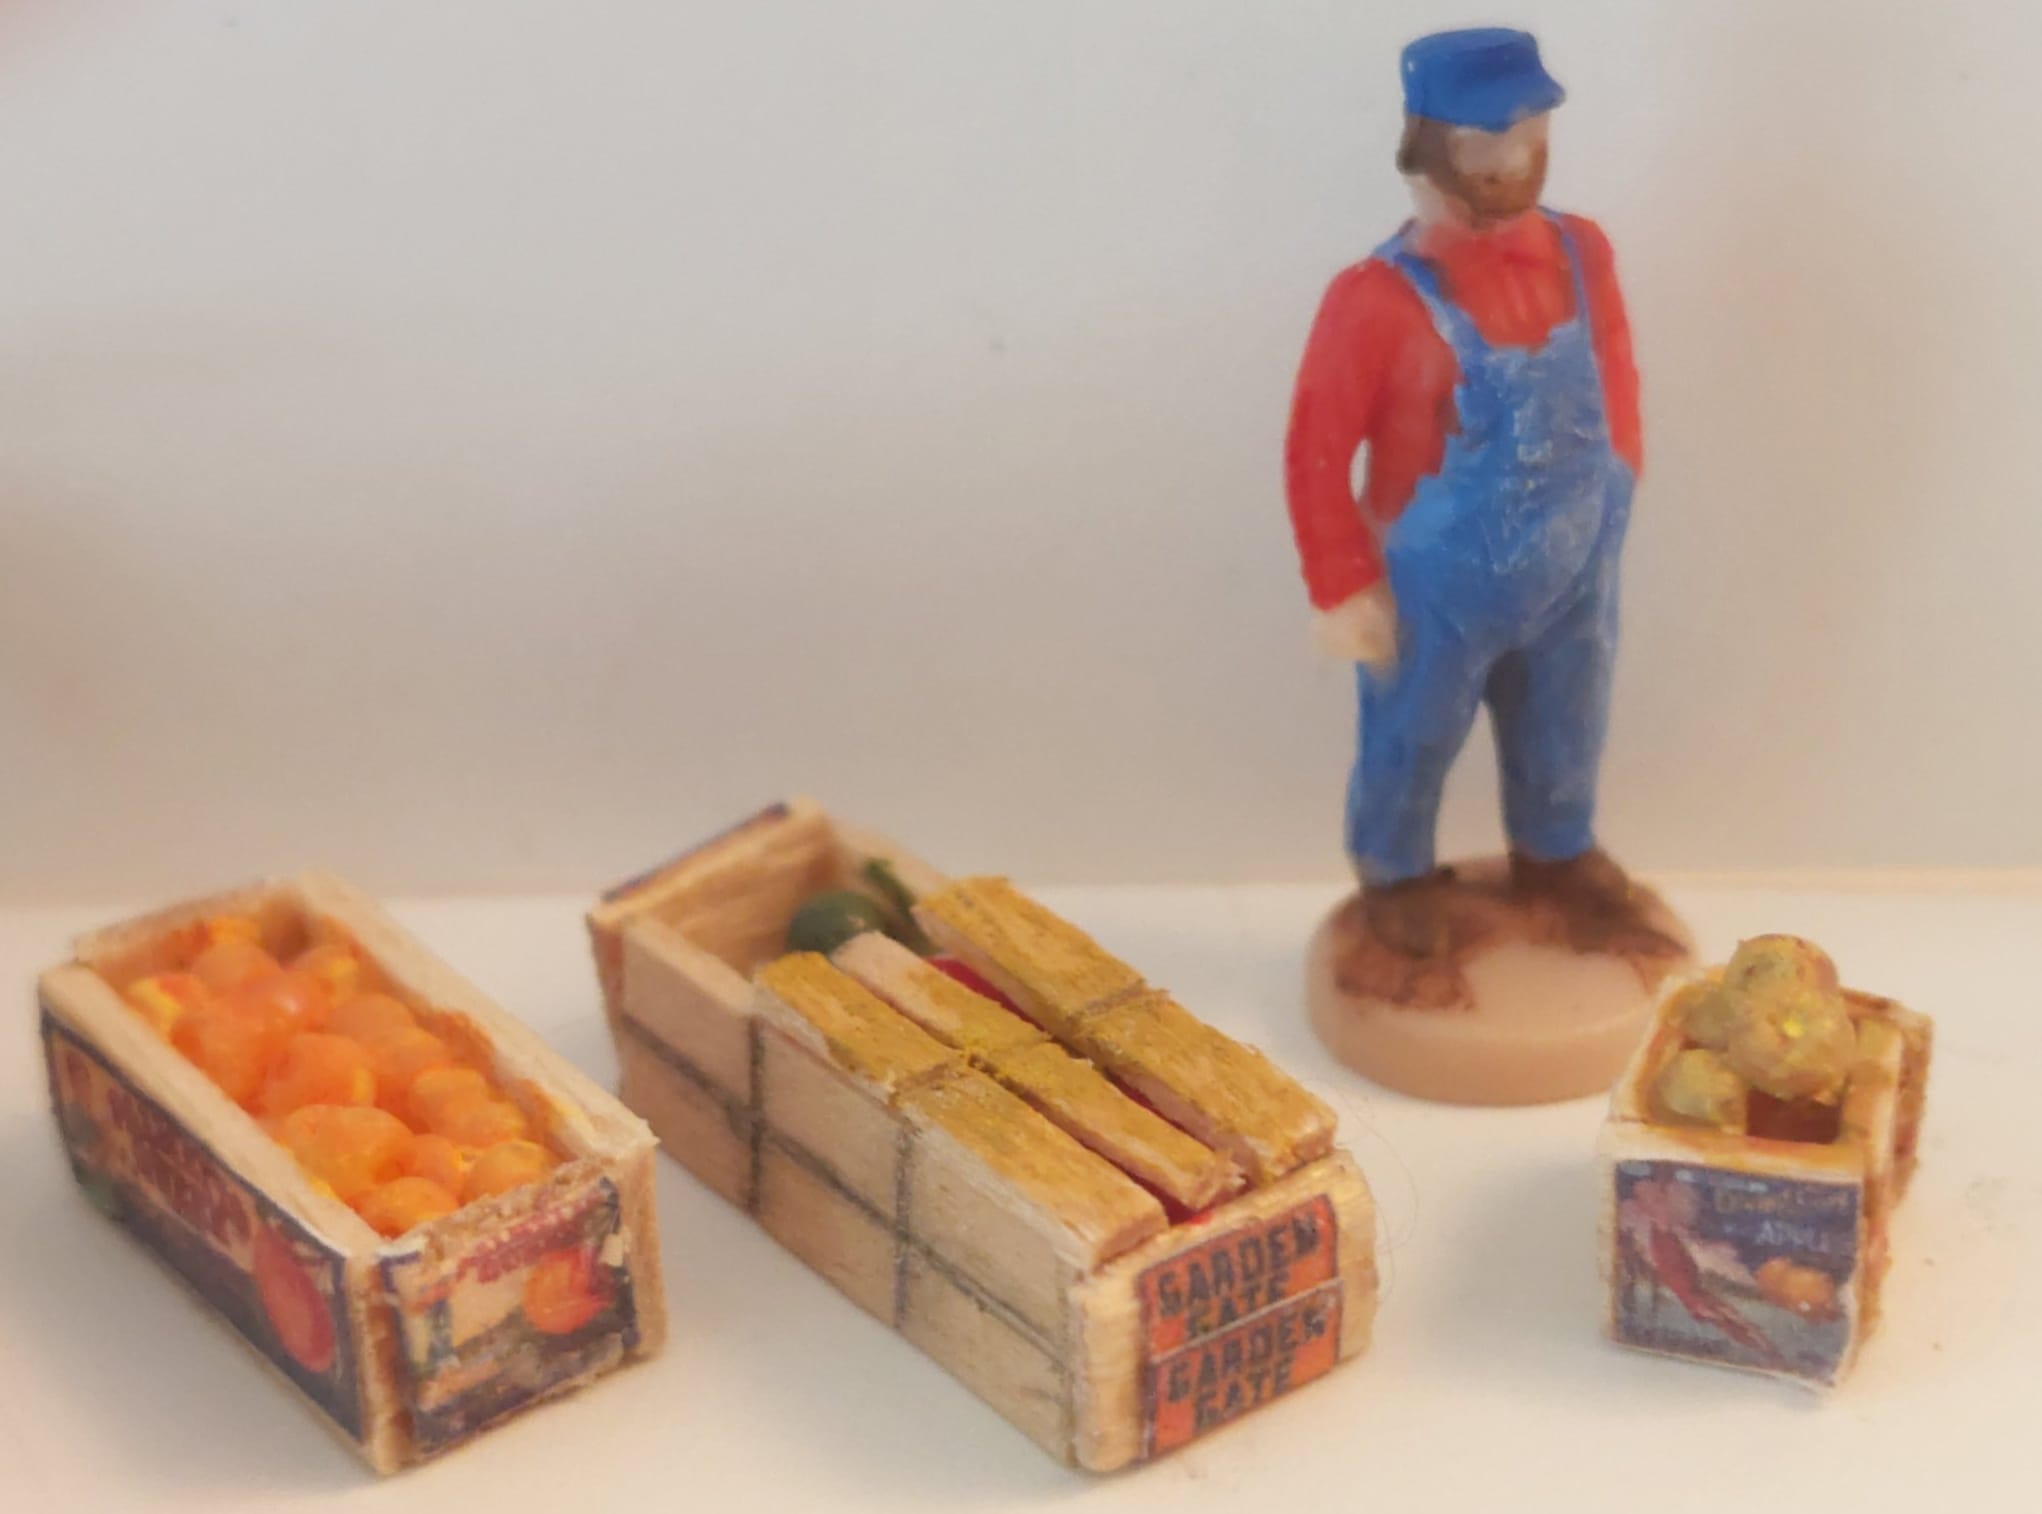
|
 Paper print out pasted on shaped wood. |
 Paper print out pasted on shaped wood. |
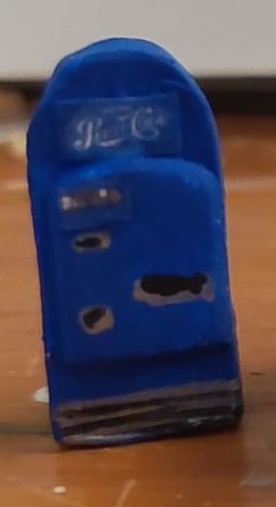 Cardboard, paint, and a print out of a vintage Pepsi logo |
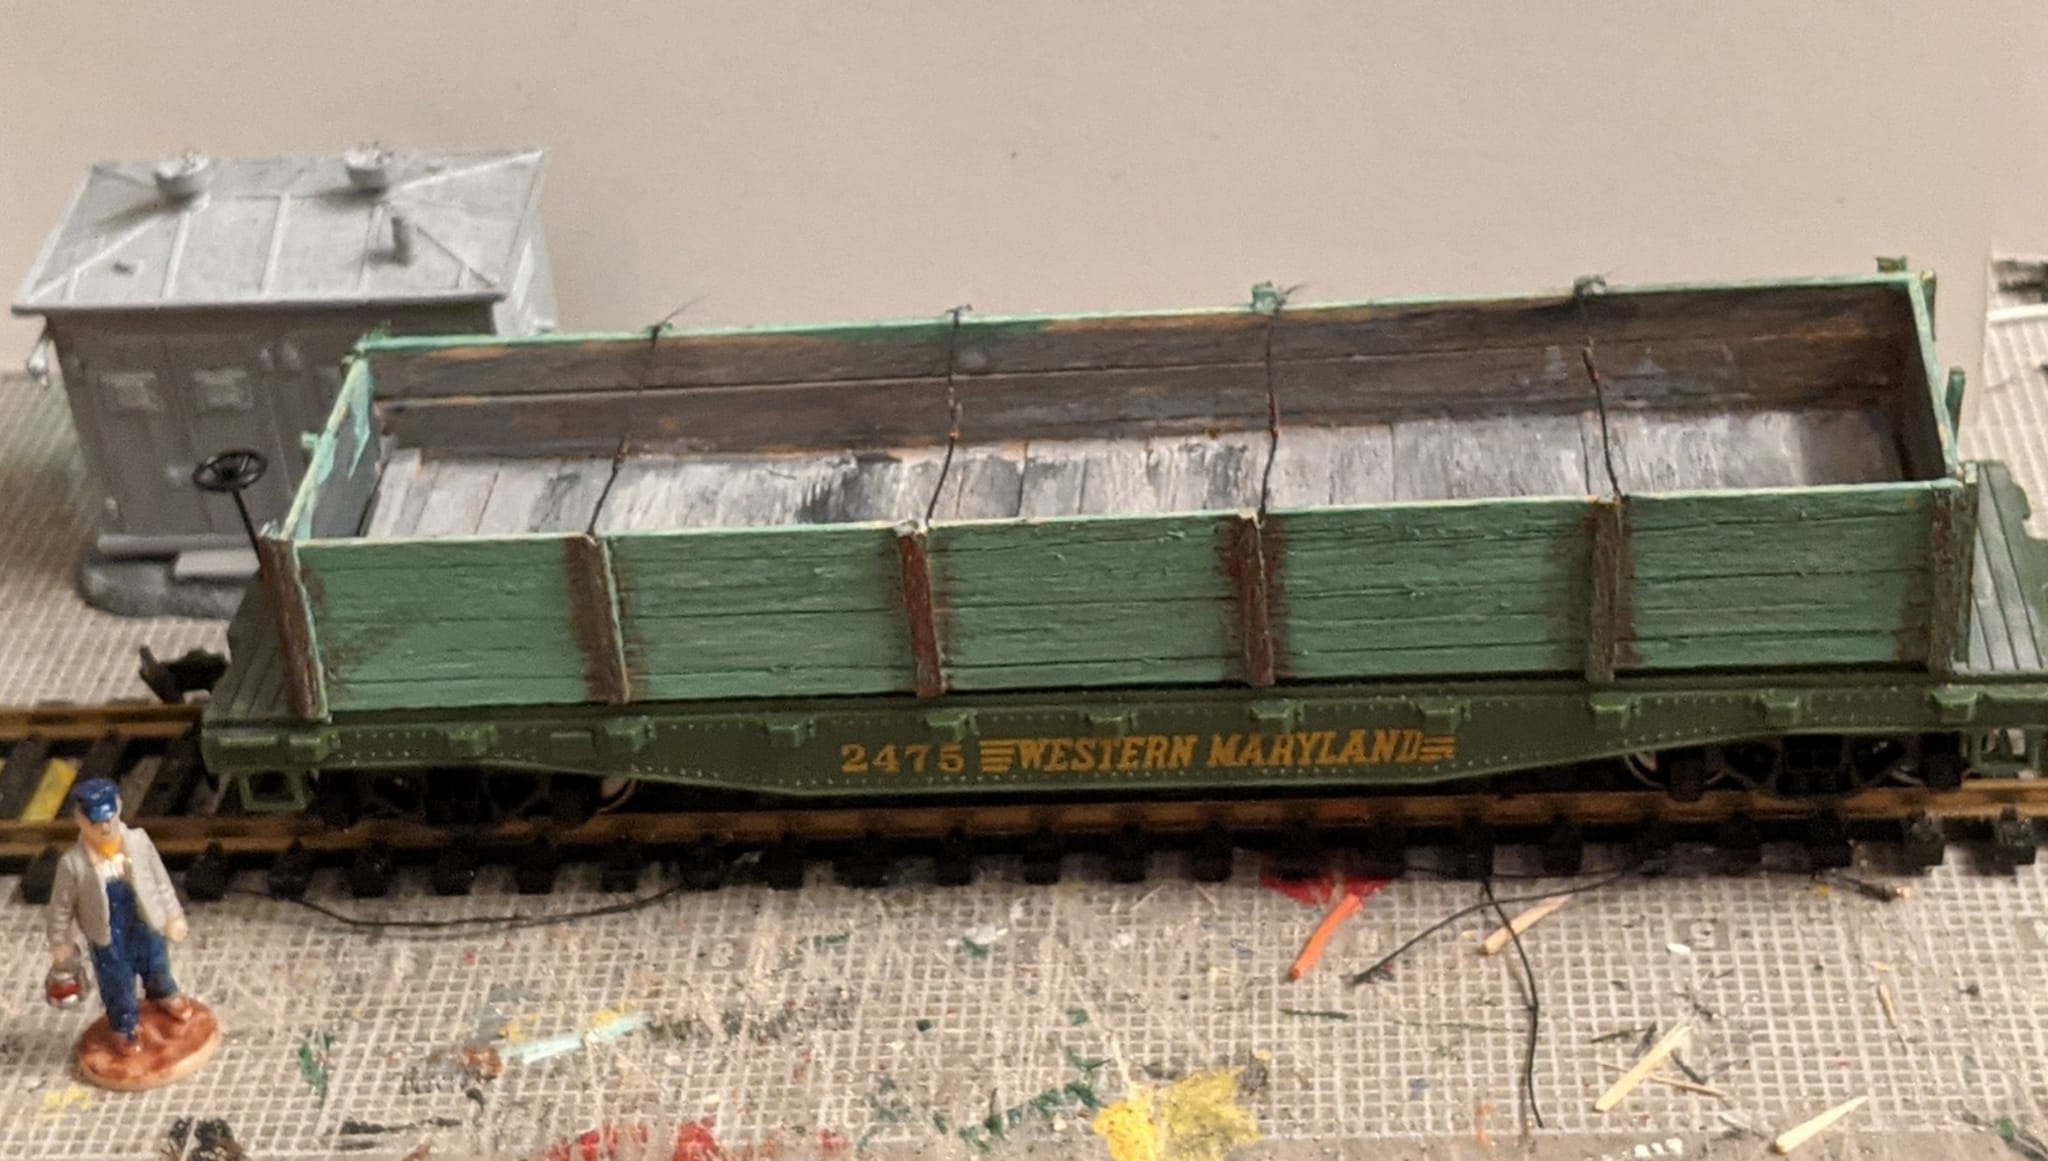 A gondola "cover" made from wooden coffee stirrers to hide the molded bays of a Tyco pipe flat car. |
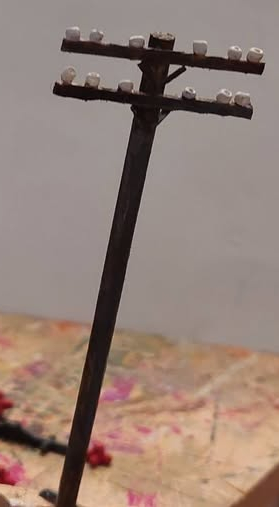 Wooden dowel, matchsticks, seed beads, & paint. |
|
As a former CAD/CAM developer for a major manufacturer, I have a few clues about the modeling aspect of printing in 3D. I just never had to do it myself until now. I am trying to find the right balance between building things vs printing them. My ability to manually manage tiny details is becoming more challenging, but I also want to keep to my principles of reusing materials at hand. We'll see what happens.....
In general, of the printable files I have found available online, I have some observations that might help people new to 3D printing--specifically when working with filament printing. For resin printing, I don't have any comments until I get a resin printer.
1 foot = 3.50 mm
5 feet = 17.50 mm
6 feet = 21.00 mm
| Accessories | |||
|---|---|---|---|
| I like adding a few details to help imply more realism to buildings. It is hard to make some accessories in bulk by hand, so 3D printing is great for some of these. Electrical meters, trashcans, vending machines, tables and chairs for interiors, etc. I've made all of these individually from scrap material, but it takes a long time to add them for dozens of buildings and scenes. | |||
| Buildings | |||
|---|---|---|---|
| Other than one small White Tower restaurant, all my 3D prints of buildings have been for background structures. The detail level of filament printing is perfectly fine for most of them. For brick structures, once painted, they look just as convincing as commercially produced models (at least at my level of modeling expertise). I'll be honest, these are some of my first attempts at learning 3D printing for scale buildings. The cost per building decreases every time I create a useable print--even accounting for failed prints. | |||
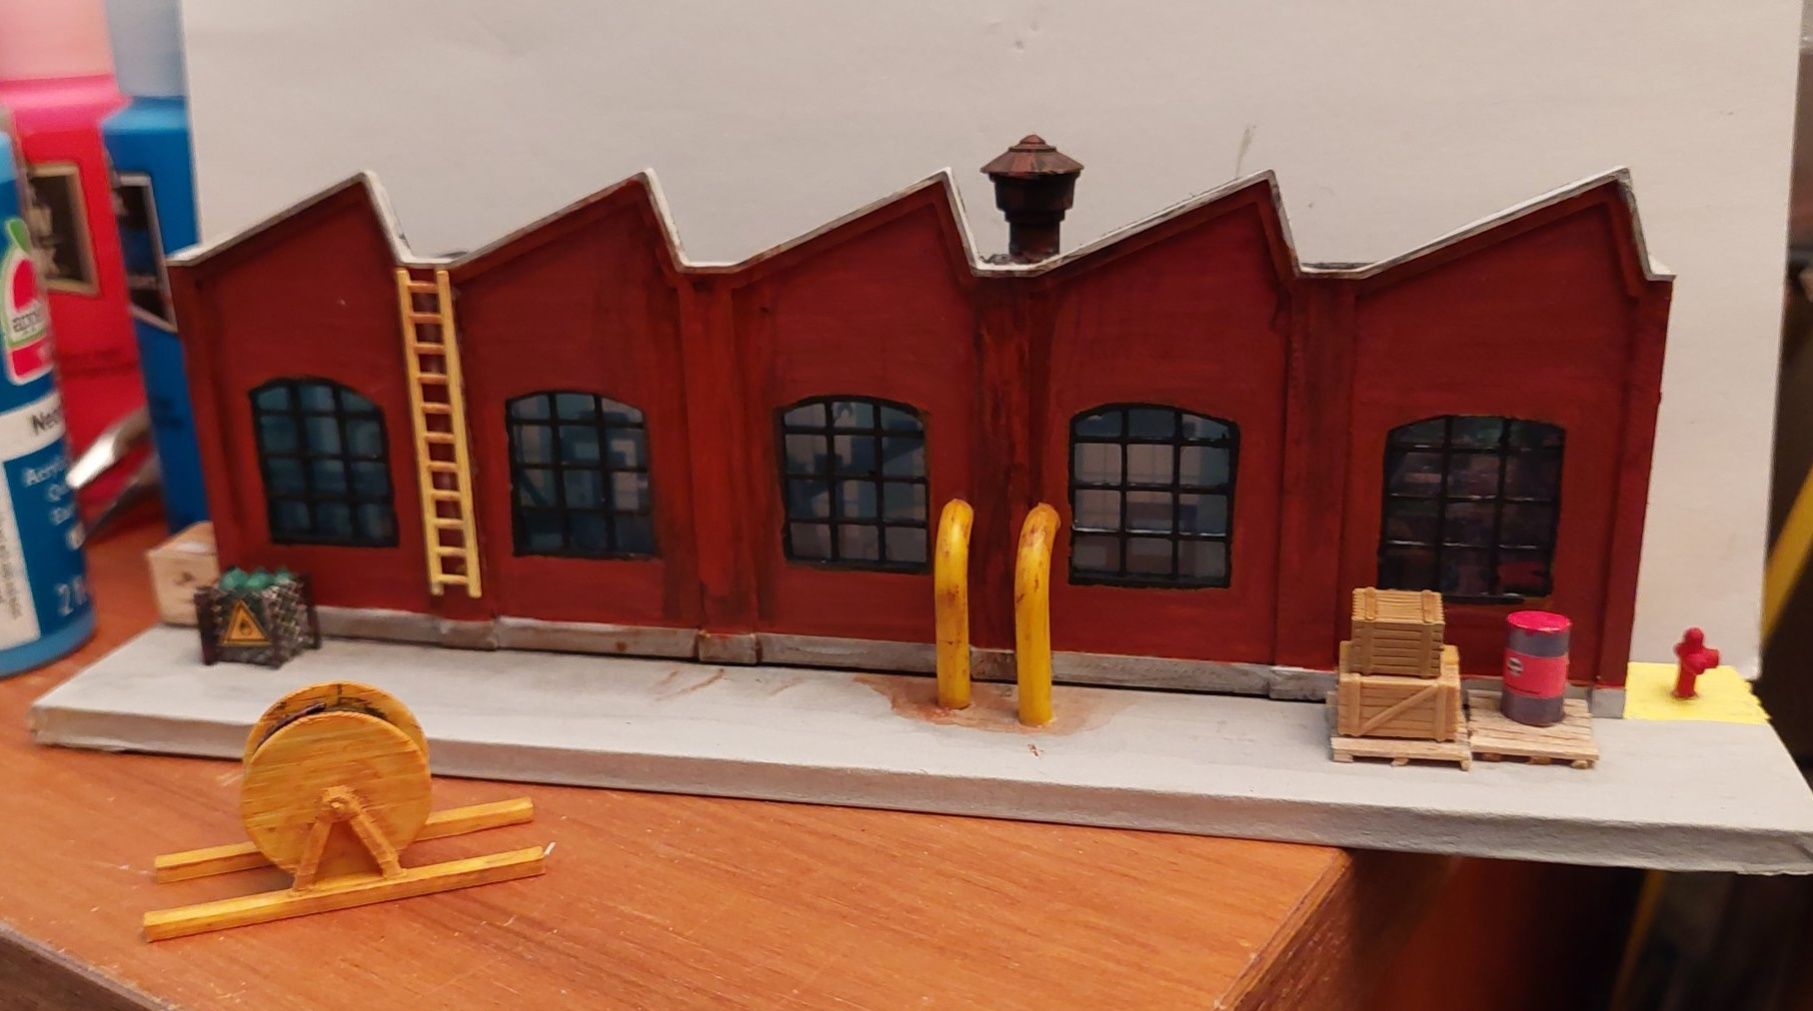 Simple factory background flat. I used a paper print out for the interior scene, and spares from my parts box for the boxes, vent, and ladder. I created the piping, hydrant, and gas cyinders from the ends of model sprues. The oil barrel is a plastic straw wrapped with paper, and the pallets are just pieces of coffee stirrers cut and split to size. |
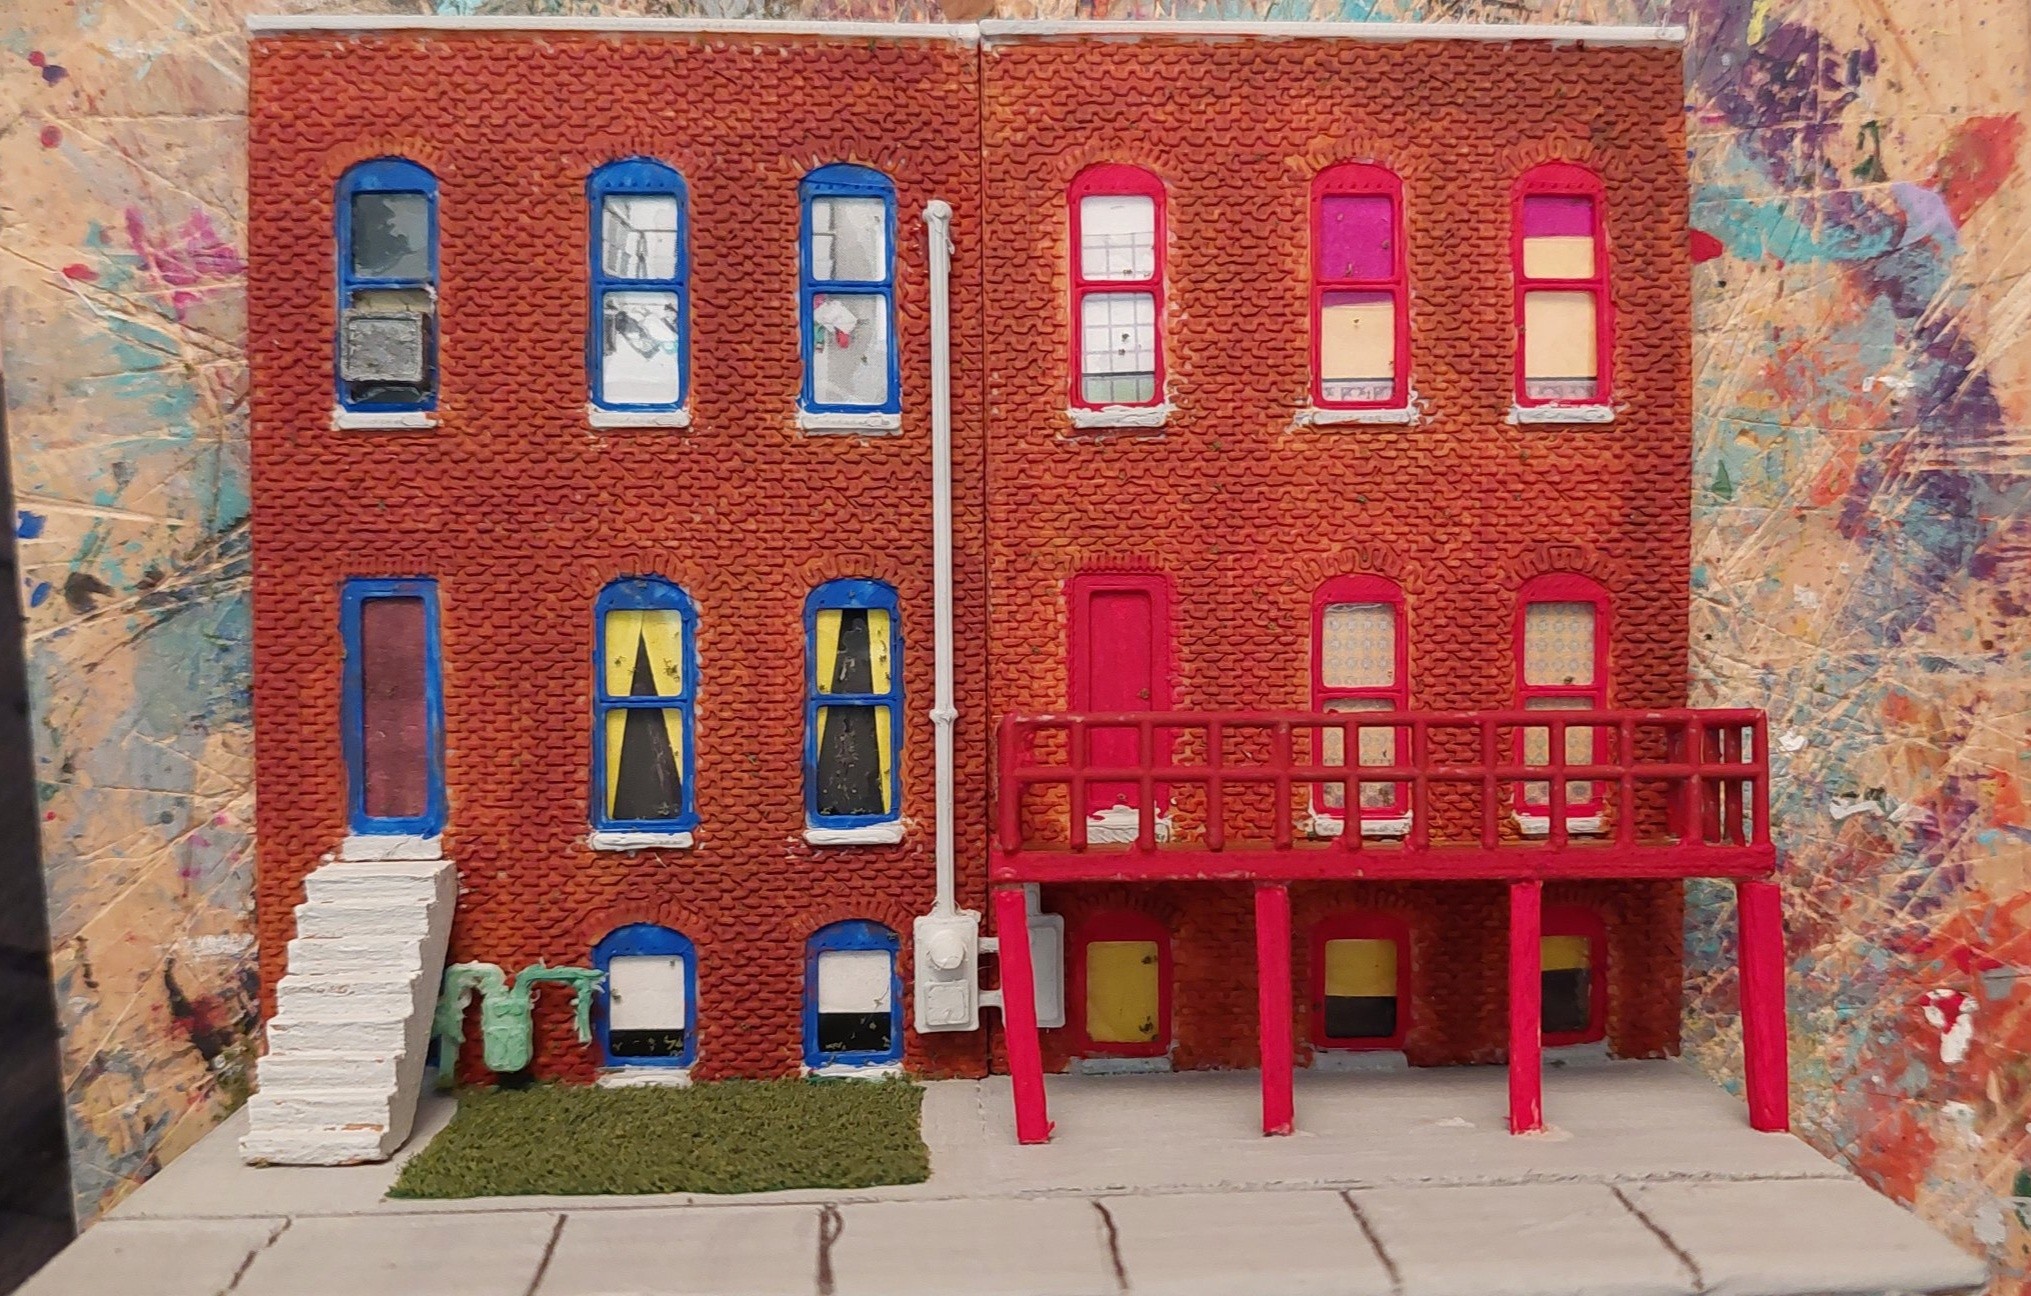 The brownstone backs were accidentally scaled slightly smaller than I intended, but they were not so small that I would simply toss them out. Paint, paper prints, some 3d printed gas and electric service details, and a few items from my scrap box for the deck. |
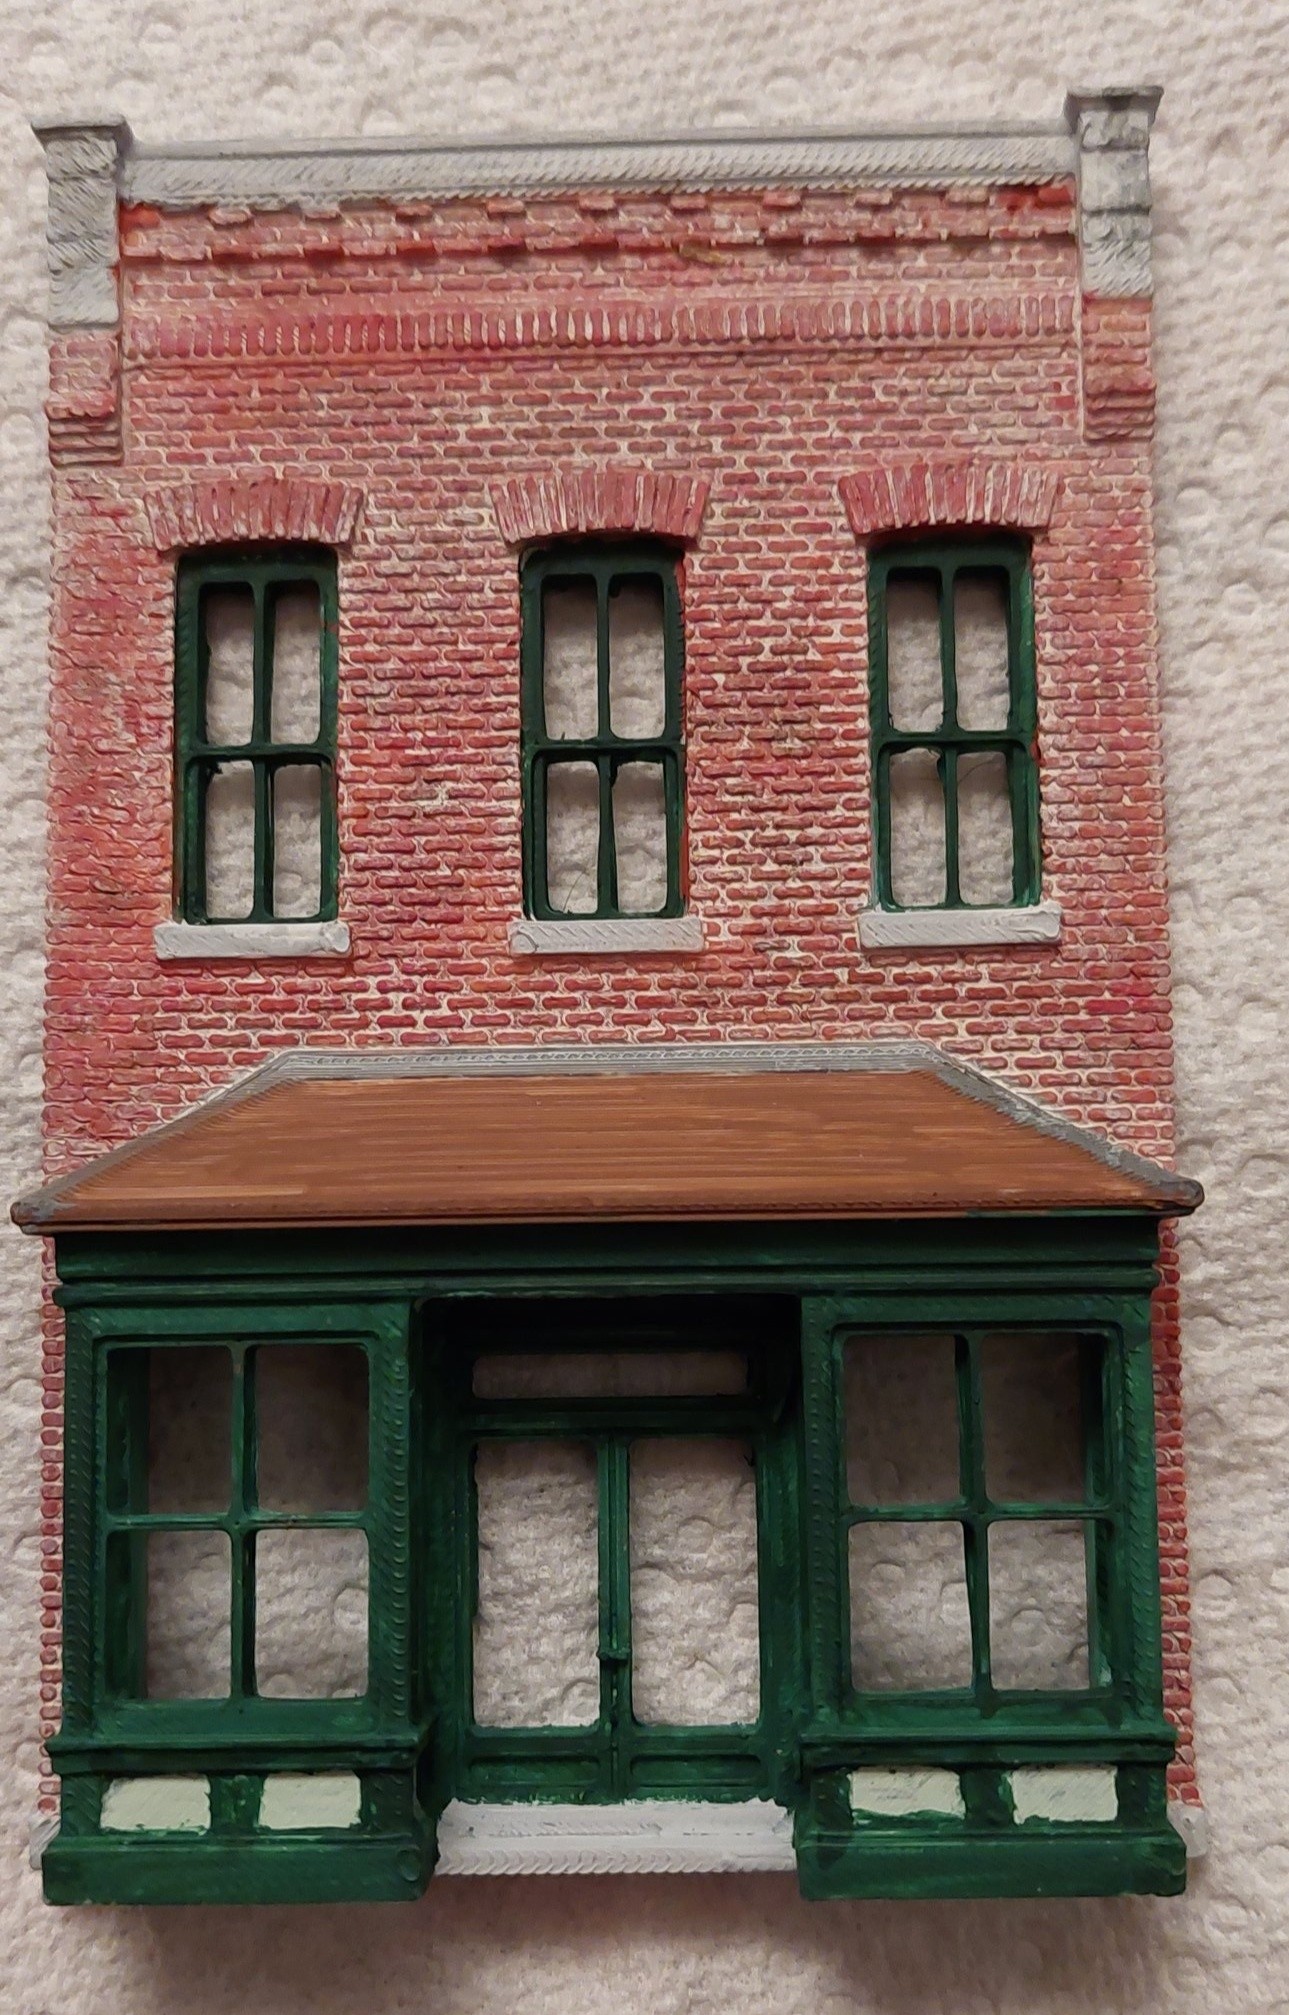 This brick shop front turned out well enough after painting that I wouldn't mind it being closer to the front of the layout. I just need to decide what kind of shop it is. |
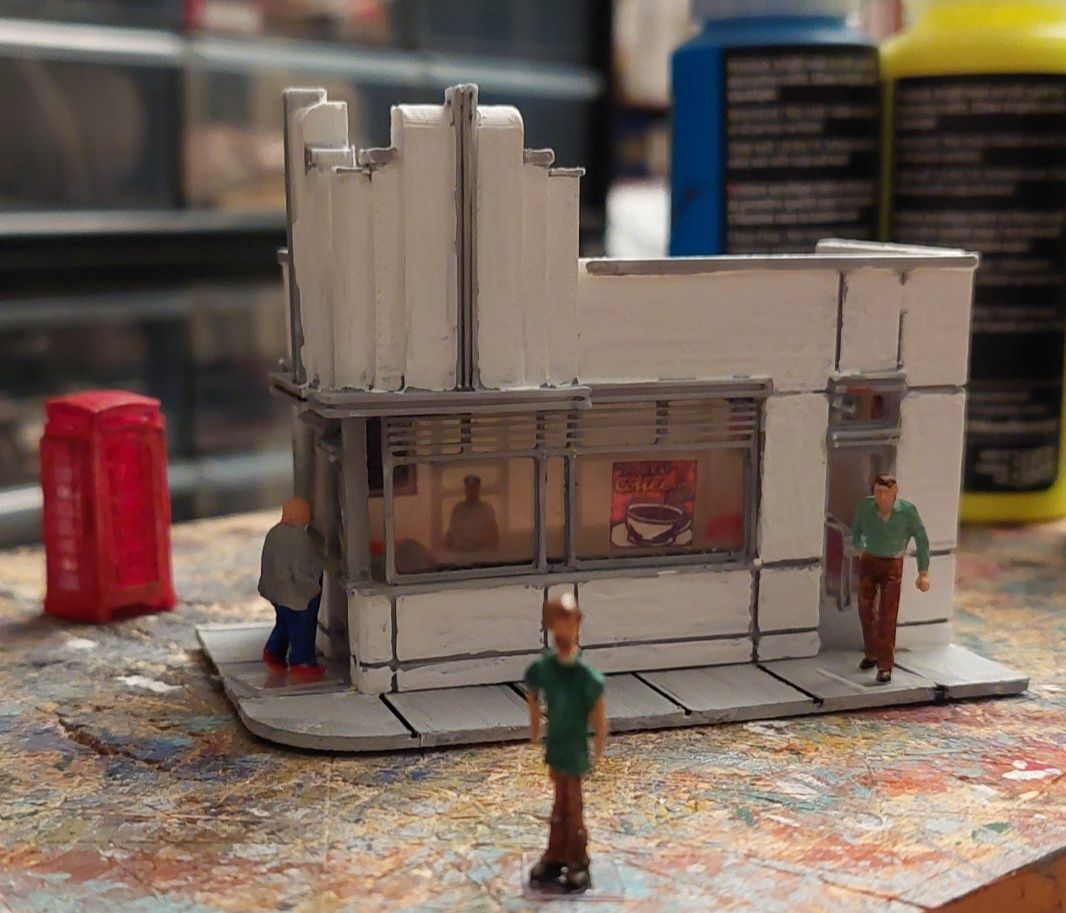 I found the print files for this in O-scale on Mark DiVecchio's site and I reduced it to HO for printing. The corner window did not print out well for me, but I assembled the model anyway. It went together pretty well as the original STL file was well constructed. I need to touch up the paint and details a little. My close up photo shows too many flaws. |
| Figures | |||
|---|---|---|---|
| Figures have been the most difficult item for me to print reliably using filament. Part of the issue is the size of the nozzle I am using, as well as understanding the correct settings for extrusion. Most experienced people tell me that a 0.02mm nozzle is necessary for better detail. |
| Vehicles | |||
|---|---|---|---|
|
Vehicles are the second-most difficult items to print, in my opinion. The shell thickness issue I previously identified occurs
most often when scaling down a vehicle models--usually a nice automobile or truck. Secondarily, many of the vehicles I have found have wheels as a separate file, and unfortunately, the wheels are scaled differently than the vehicle, so some experimentation was required to make them the correct diameter. |
|||
|
Ealdercote and the images contained therein are © 1997-2025 J.T.Thorpe and C.M.Grewcock
Last updated December 2025 |