

Early Victorian Rail Travel
Steam Gear
Steampunk Gallery
Railroad Photos


|
Bet you are here to see what we think of as "Steam Gear". What follows are some examples of the props and accessories we've put together for ourselves. We are trying to keep things really low cost, and after some brief consideration, we also decided that lightweight is of great importance, too. I keep teasing my apprentice that if he keeps making all his stuff out of authentic machine parts and solid brass, it will pull down his pants (or kilt, depending on what he decides to wear). At any rate, we come from a community where sharing our knowledge and experience often leads to inspiring others to go beyond our efforts (and ultimately makes it a better community for us all). If we ever decide to do a commercial venture, we'll probably quit sharing our trade secrets, though....
 |
STEAMPUNK GEAR & ACCESSORIESClick the any of the images below to see a larger view. |
 |
| "Ubiquitous Goggles" |
| |
 |
 |
|
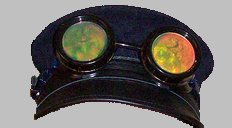
The easiest accessory of all for steampunk is a set of goggles. Yes, it is so ubiquitous that it is a cliché. Simple, or complex, it is to steampunk like wearing a pair of mouse ears is to visiting Disneyland. Most of us love the goggles in spite of what some critics condescendingly snark.
Thaddeus did a few simple modifications to our goggles. In both cases, a discarded mini leather belt was recut, and sewn or gromitted into a new strap to replace the distinctly modern elastic bands that come with these things followed by a little paint here and there to give it the "brass goggles" look.
To pile cliché upon cliché, a few watch parts were added to Thaddeus's goggles, and then he "rediscovered" some old holograms of watches he had, and sandwiched them in between the lenses to give them a fairly unique look. As Prof. Penelope's interest is in ancient Egypt, her goggles received a different treatment--with decorative Eyes of Horus.
|
| "Wireless Portable Telegraph" |
| |
 |
|
|
If Bell hadn't developed the telephone, I suspect that Marconi and Tesla would have created wireless telegraphs instead of the radio. This is Thaddeus' first attempt at a steampunk prop. An old shorted-out tabletop radio was gutted (the parts were reused in other projects), slightly refurbished, and kitted out as a crank-operated wireless telegraph with handy carrying strap. A key from an old Morse code training set was fitted onto a leather "bracer", and a set of crystal headphones completed the setup. Lesson learned: Do not have so many dangling wires from your props!
|
| "Electrostatic Gun" |
| |
 |
 |
|
This is Thaddeus's second attempt at making steampunk props. This began life as a translucent purple water pistol. What a difference some copper and bronze spray paint, some contact paper, and a couple of odds and ends make!
Buck Rogers goes steampunk....
The odds and ends are a piece of copper wire from a thermostat, a toy kaledescope lens, and an old "Autolite" capacitor that Thaddeus found in the crawlspace of our house.
|
| "Reality Engine" |
 |
 |
 |
 |
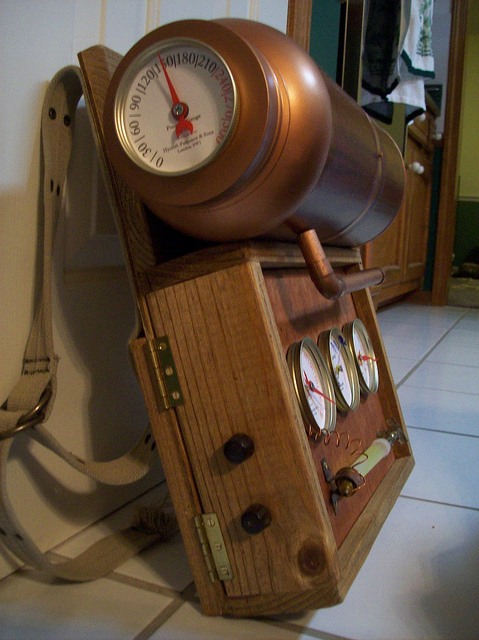
Built for DragonCon 2010. Thaddeus decided that the wireless telegraph was a little too much trouble to carry around--it encumbered one hand, and kept getting knocked into things. The Reality Engine didn't start with much more
than a plan to make "somthing with pipes" that was low-cost, lightweight and didn't interfere with taking pictures and wouldn't constantly bump into tables in the dealers' rooms.
It isn't a great prop in and of itself (that's what you get when you build without a plan), but Thaddeus experimented with several tricks to simulate "the real things".
- Copper pipe? Too expensive. Copper spray paint and some 1/4" dowel rods work great with a handful of stray copper elbows found in a junk box under the house.
- Real brass gauges lend a lot of authenticity, but are darn heavy, hard to come by, and tend to be expensive when you do find them ("unless you know this guy"). Brass-tone steel peanut butter jar lids and a little patient effort with Microsoft WordArt will give you any type of gauge with any type of scale you want. A little time with an Xacto blade and some discarded clear plastic packaging will yield an indicator of any size or shape that seems appropriate for your gauge. A few dabs of acrylic paint will provide the finishing touch. Cost: $0.00. Weight: less than 1 oz.
- I actually have some old wooden kegs formerly used for aging whiskey that would have made a great tank. Unfortunately they are HEAVY. This tank is two large plastic jars, cut so one fit inside the other, then painted copper. I took some wood-grained contact paper cut into strips to make the "insulating jacket, carefully placed to keep the copper "bands" exposed. This is an idea I got a couple of years ago when I wanted to disquise a Home Depot "Bubba Keg" as a wooden keg. The disguise was a lighter shade of contact paper cut in strips and some black electrical tape for the bands. It had dozens of people doing double takes once they got within less than 5 feet.
|
|


